

Temperature alerts with your own firmware
An AM2301 sensor on an ESP32-C6-Zero, a few lines of C++ written in the browser, a Python-like function and an alert on your phone, all self-hosted
Also on Hackster.io
You will build a small climate sensor that reports the room temperature and humidity to your own PNeX server, and sends a notification to your phone when it gets too hot. No cloud account, no IoT subscription: the data stays at home.
Along the way you will use three PNeX features:
- the custom firmware IDE: you write the board's code in the browser, PNeX compiles it and adds Wi-Fi, encryption and over-the-air updates for you;
- a function written in Starlark, a sandboxed language with Python syntax;
- a flow that reads the sensor, runs the function and sends the alert.
Install the PNeX server
PNeX runs on a Raspberry Pi 4 or 5 (64-bit Raspberry Pi OS Lite) or any Linux
machine with Docker. On the Pi, open a terminal (ssh [email protected]) and run:
curl -fsSL https://raw.githubusercontent.com/Pnex/pnex-deploy/main/install.sh \
  | sudo bash -s -- --admin-user [email protected] --admin-password 'choose-a-strong-one'
Then open https://pnex.local/ in your browser, trust the server certificate and
sign in. The step-by-step guide with screenshots is in
Set up PNeX on a Raspberry Pi.
Wire the sensor
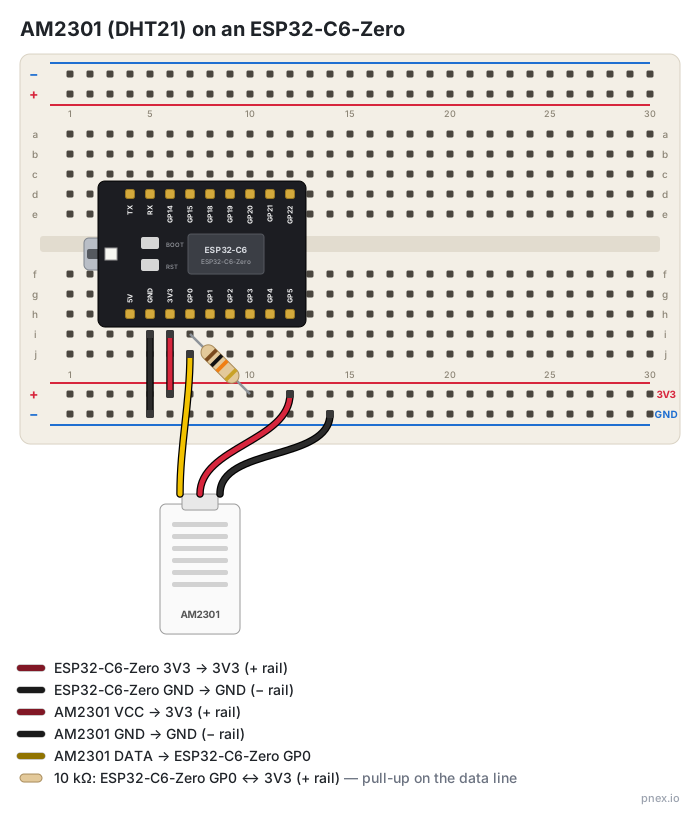
Plug the ESP32-C6-Zero across the middle of the breadboard. The AM2301 has three wires:
| AM2301 wire | Goes to |
|---|---|
| Red (VCC) | 3V3 pin (or 5V: the sensor accepts both) |
| Black (GND) | GND pin |
| Yellow (DATA) | GP0 pin |
Add a 10 kΩ resistor between the yellow wire's column and 3V3. It keeps the data line high between two readings.
Count the pins carefully. On the side of the USB connector, the pins are, in order: 5V, GND, 3V3, GP0. GP0 is the fourth pin, not the third one.
Most Zero boards ship with their pin headers not soldered. Solder them, or the pins will not touch the breadboard. The board still powers up over USB, so nothing looks wrong until you try to read the sensor.
Create the firmware project
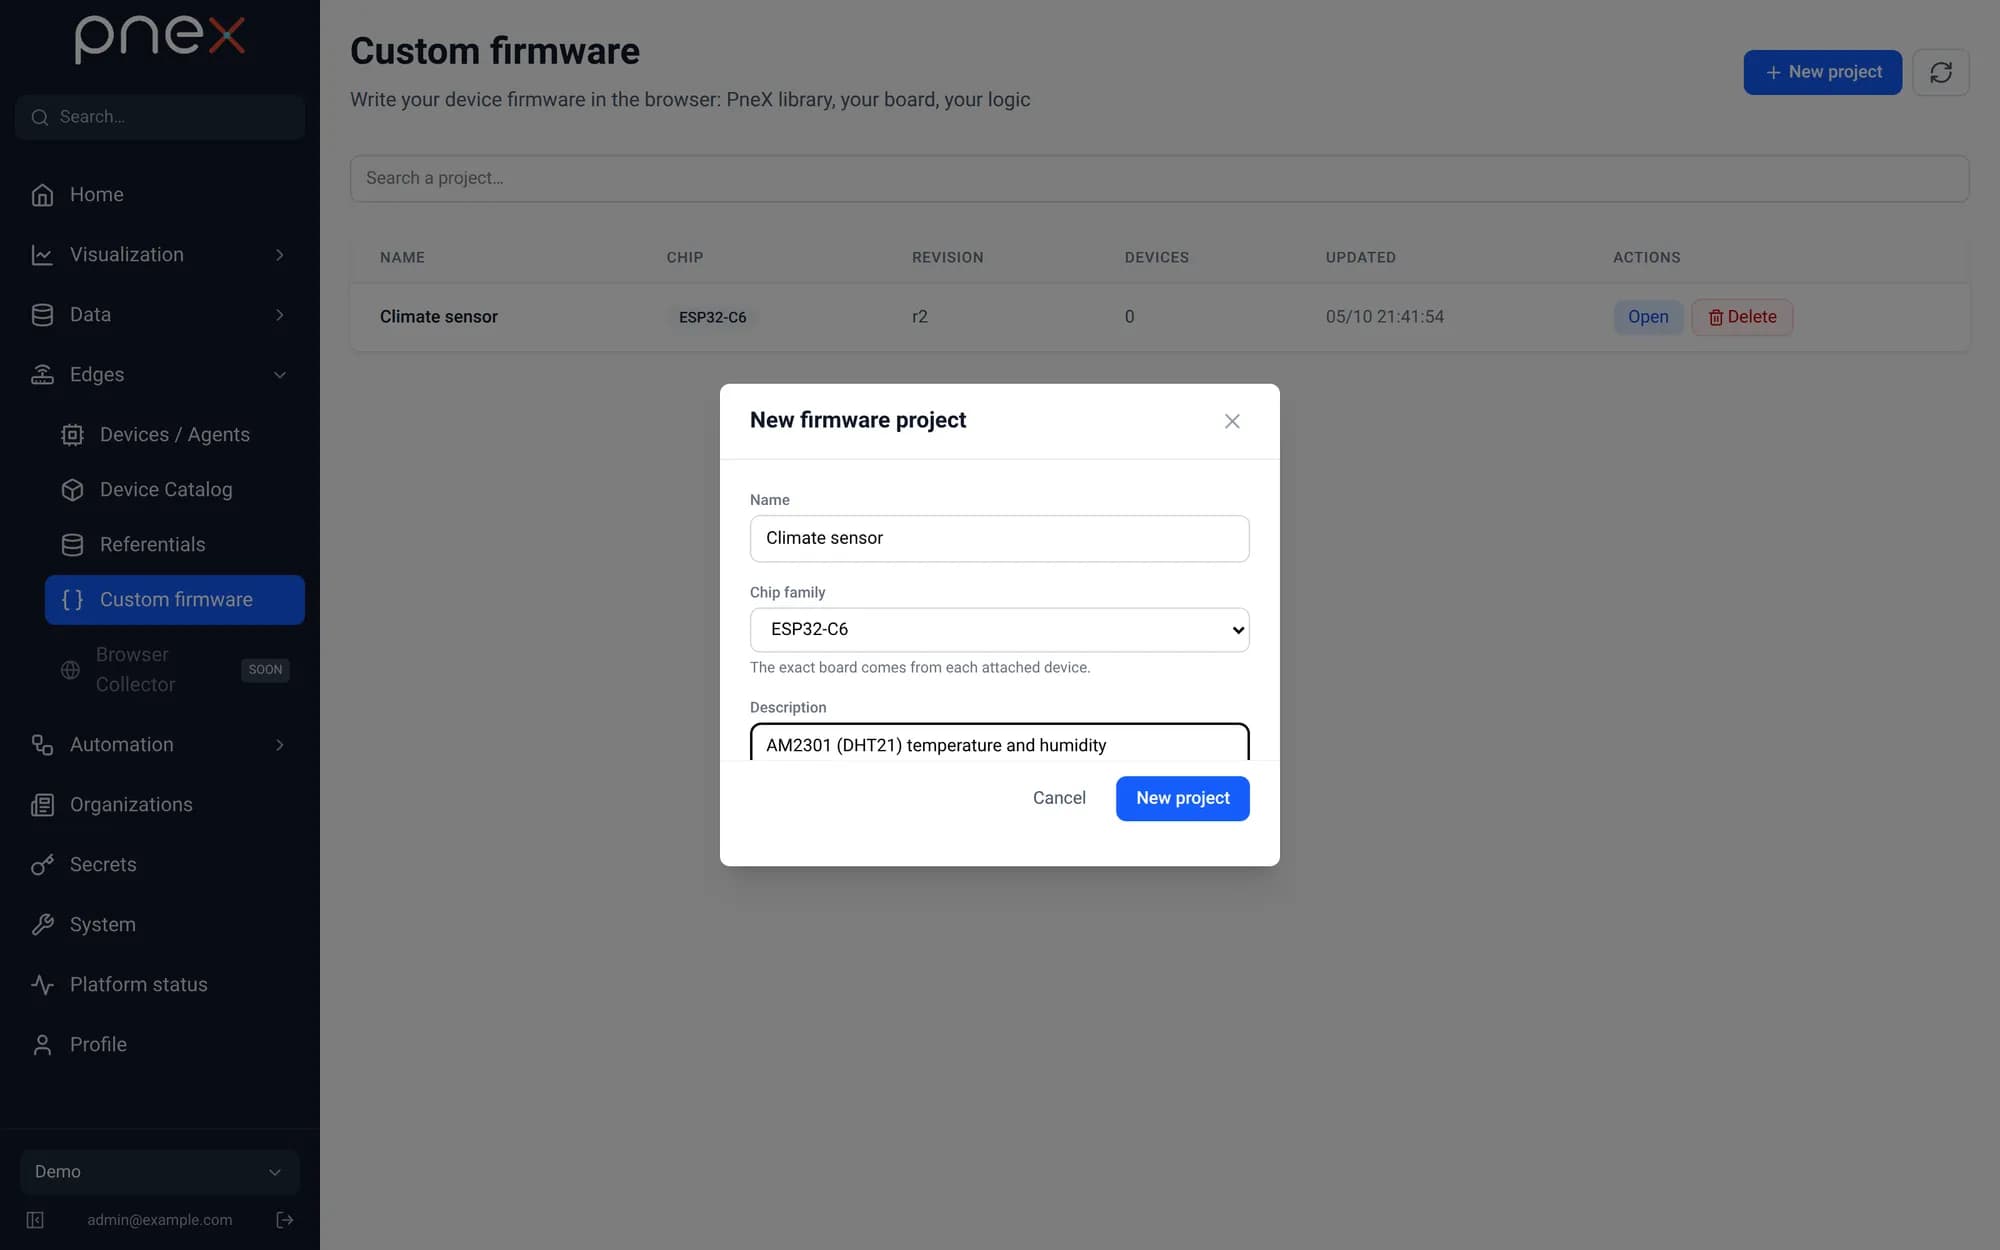
Open Edges → Custom firmware → New project. Name it Climate sensor, pick the
chip family ESP32-C6, and create it.
The editor opens with a starter sketch. Everything PNeX needs (Wi-Fi, the encrypted link to the server, over-the-air updates) lives in the PNeX library. Your file only holds your logic.
Add the sensor library
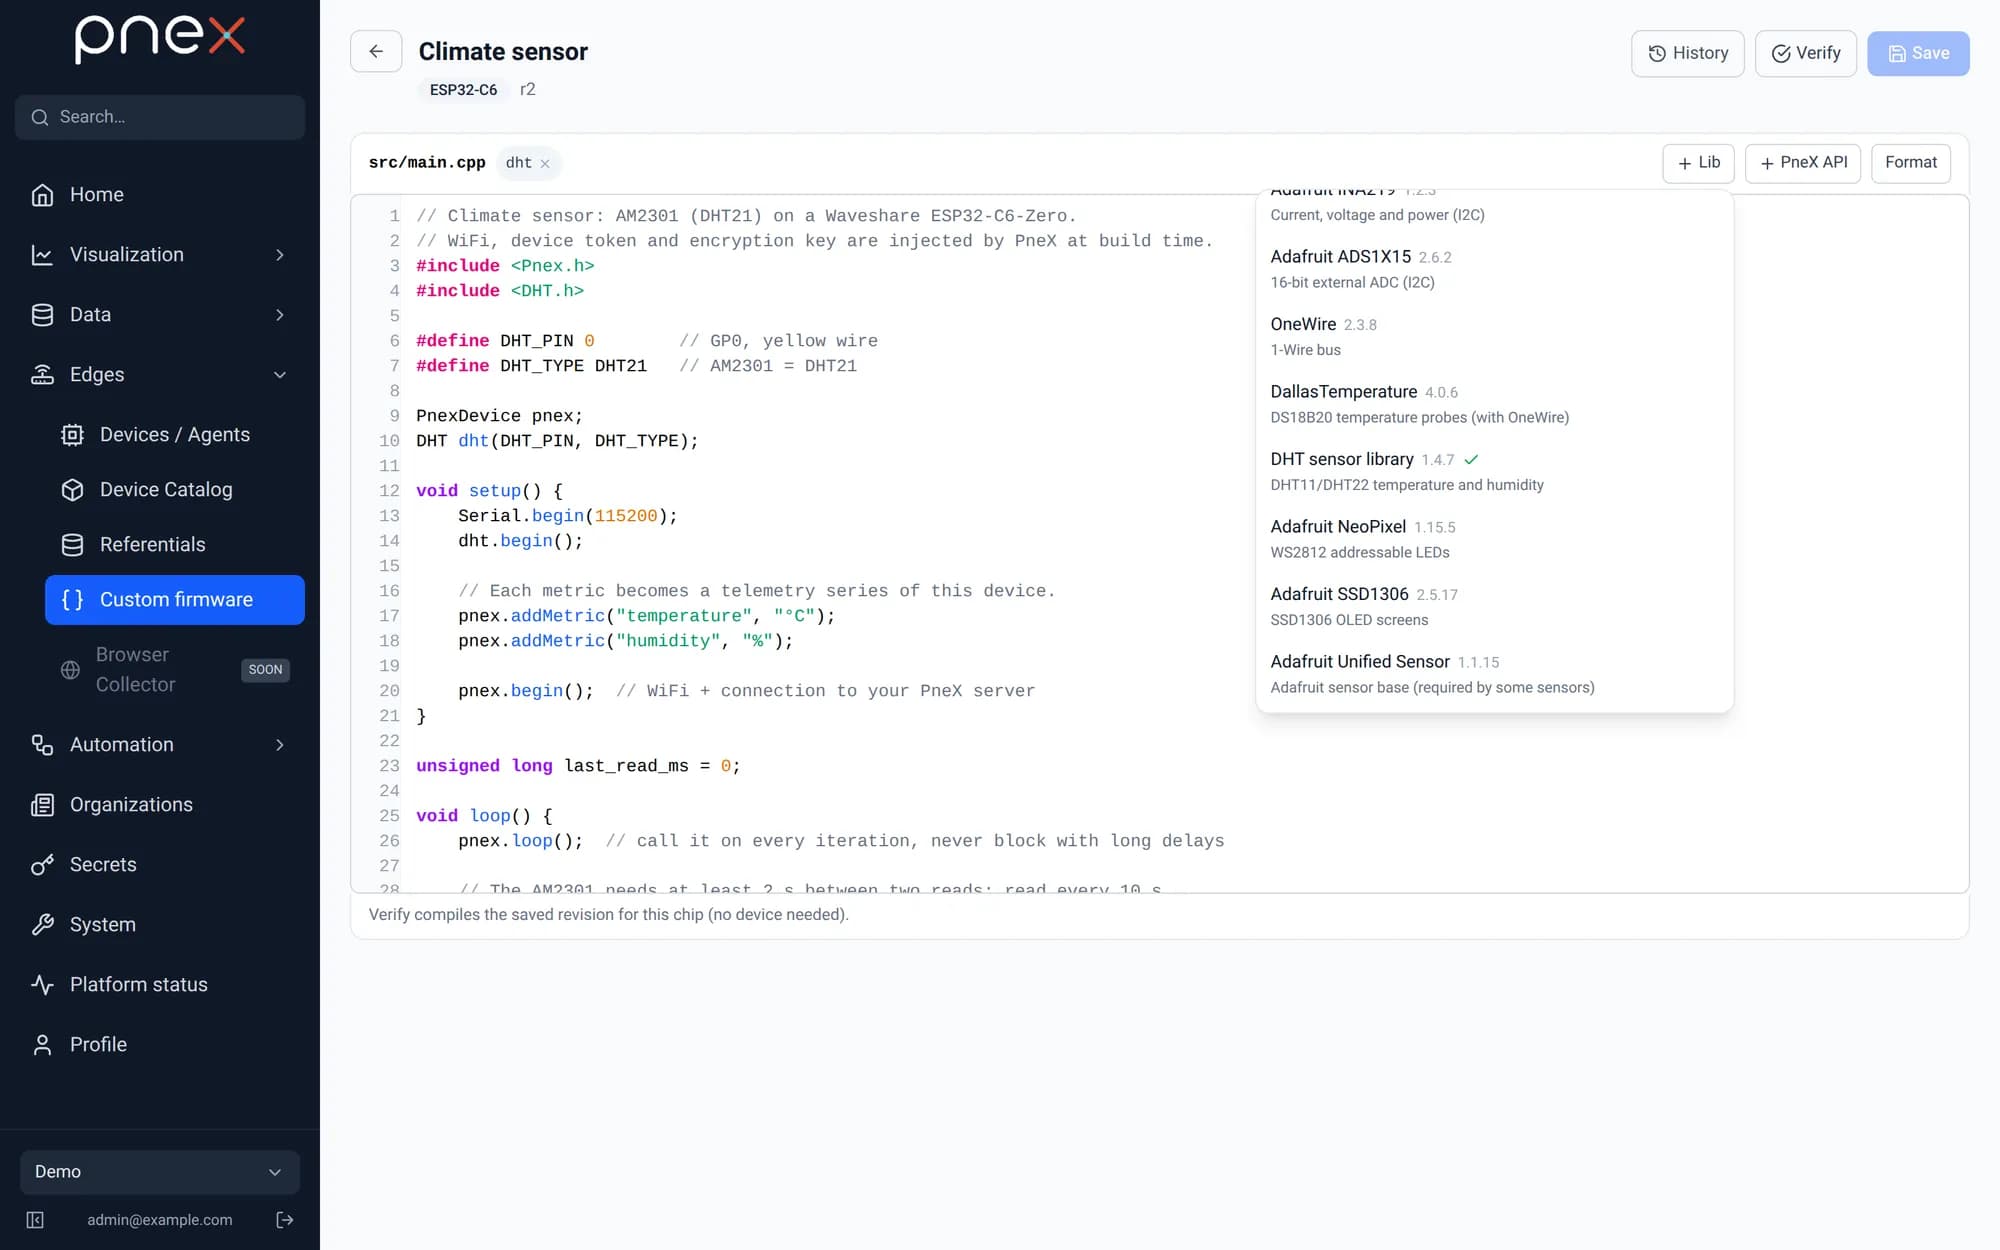
Click + Lib and pick DHT sensor library. The AM2301 is the same sensor family
as the DHT21. The library shows up as a chip next to src/main.cpp.
Only libraries from this list can be used. Their versions are pinned, so the build is the same every time.
Paste the code, save and verify
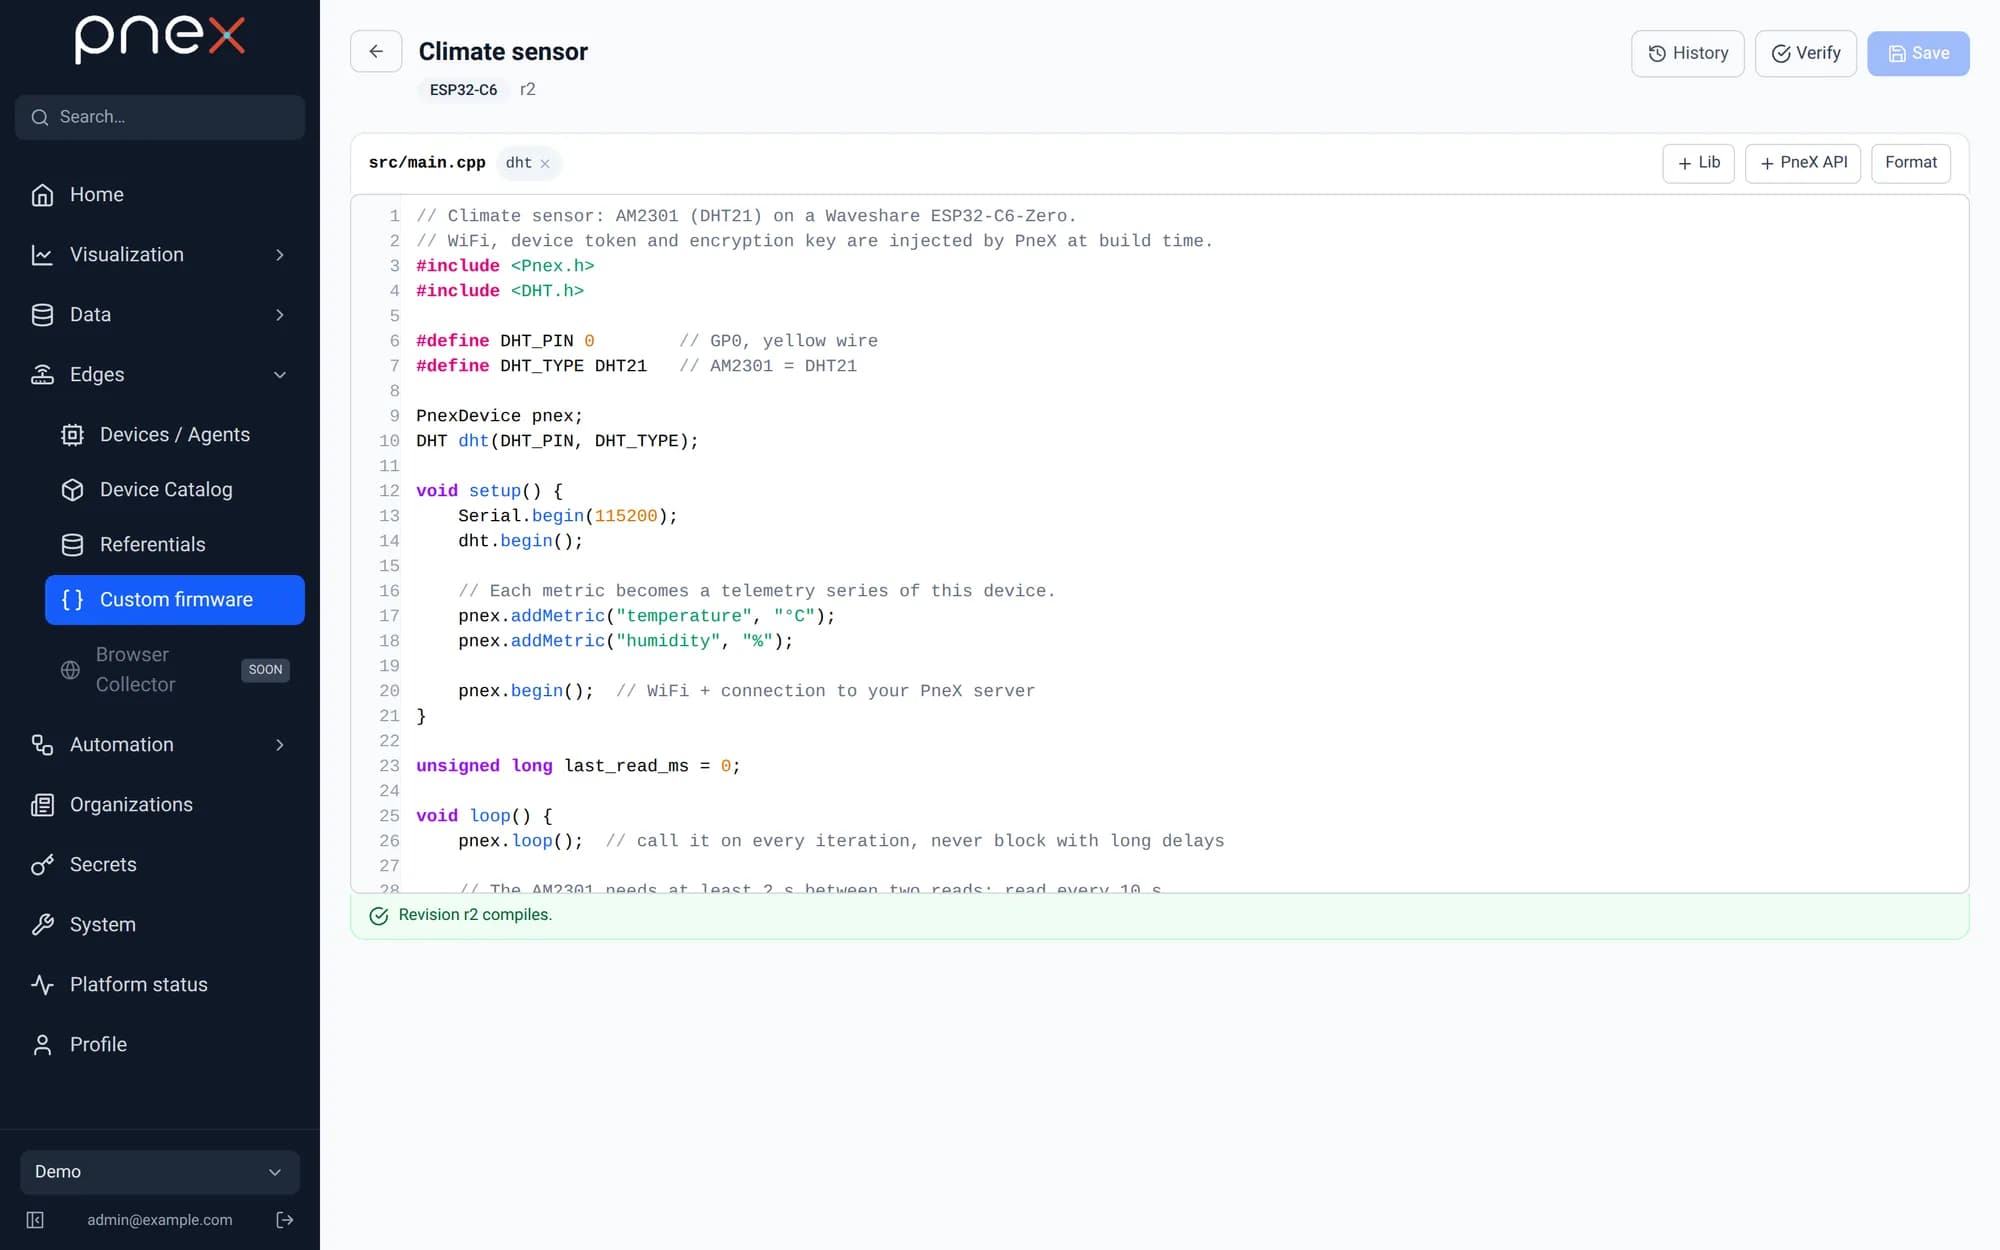
Replace the whole content of the editor with this sketch:
// Climate sensor: AM2301 (DHT21) on a Waveshare ESP32-C6-Zero.
// WiFi, device token and encryption key are injected by PneX at build time.
#include <Pnex.h>
#include <DHT.h>

#define DHT_PIN 0        // GP0, yellow wire
#define DHT_TYPE DHT21   // AM2301 = DHT21

PnexDevice pnex;
DHT dht(DHT_PIN, DHT_TYPE);

void setup() {
    Serial.begin(115200);
    dht.begin();

    // Each metric becomes a telemetry series of this device.
    pnex.addMetric("temperature", "°C");
    pnex.addMetric("humidity", "%");

    pnex.begin();  // WiFi + connection to your PneX server
}

unsigned long last_read_ms = 0;

void loop() {
    pnex.loop();  // call it on every iteration, never block with long delays

    // The AM2301 needs at least 2 s between two reads: read every 10 s.
    if (millis() - last_read_ms >= 10000) {
        last_read_ms = millis();
        float t = dht.readTemperature();
        float h = dht.readHumidity();
        if (isnan(t) || isnan(h)) {
            Serial.println("[APP] AM2301 read failed (check wiring)");
            return;
        }
        pnex.publish("temperature", t);
        pnex.publish("humidity", h);
        Serial.printf("[APP] %.1f °C  %.1f %%\n", t, h);
    }
}
Click Save and verify. The server compiles the code for the ESP32-C6 (the first build takes a couple of minutes).
Note what is not in the code: no Wi-Fi password, no server address, no key. PNeX injects them when it builds the firmware for your board.
Register the board
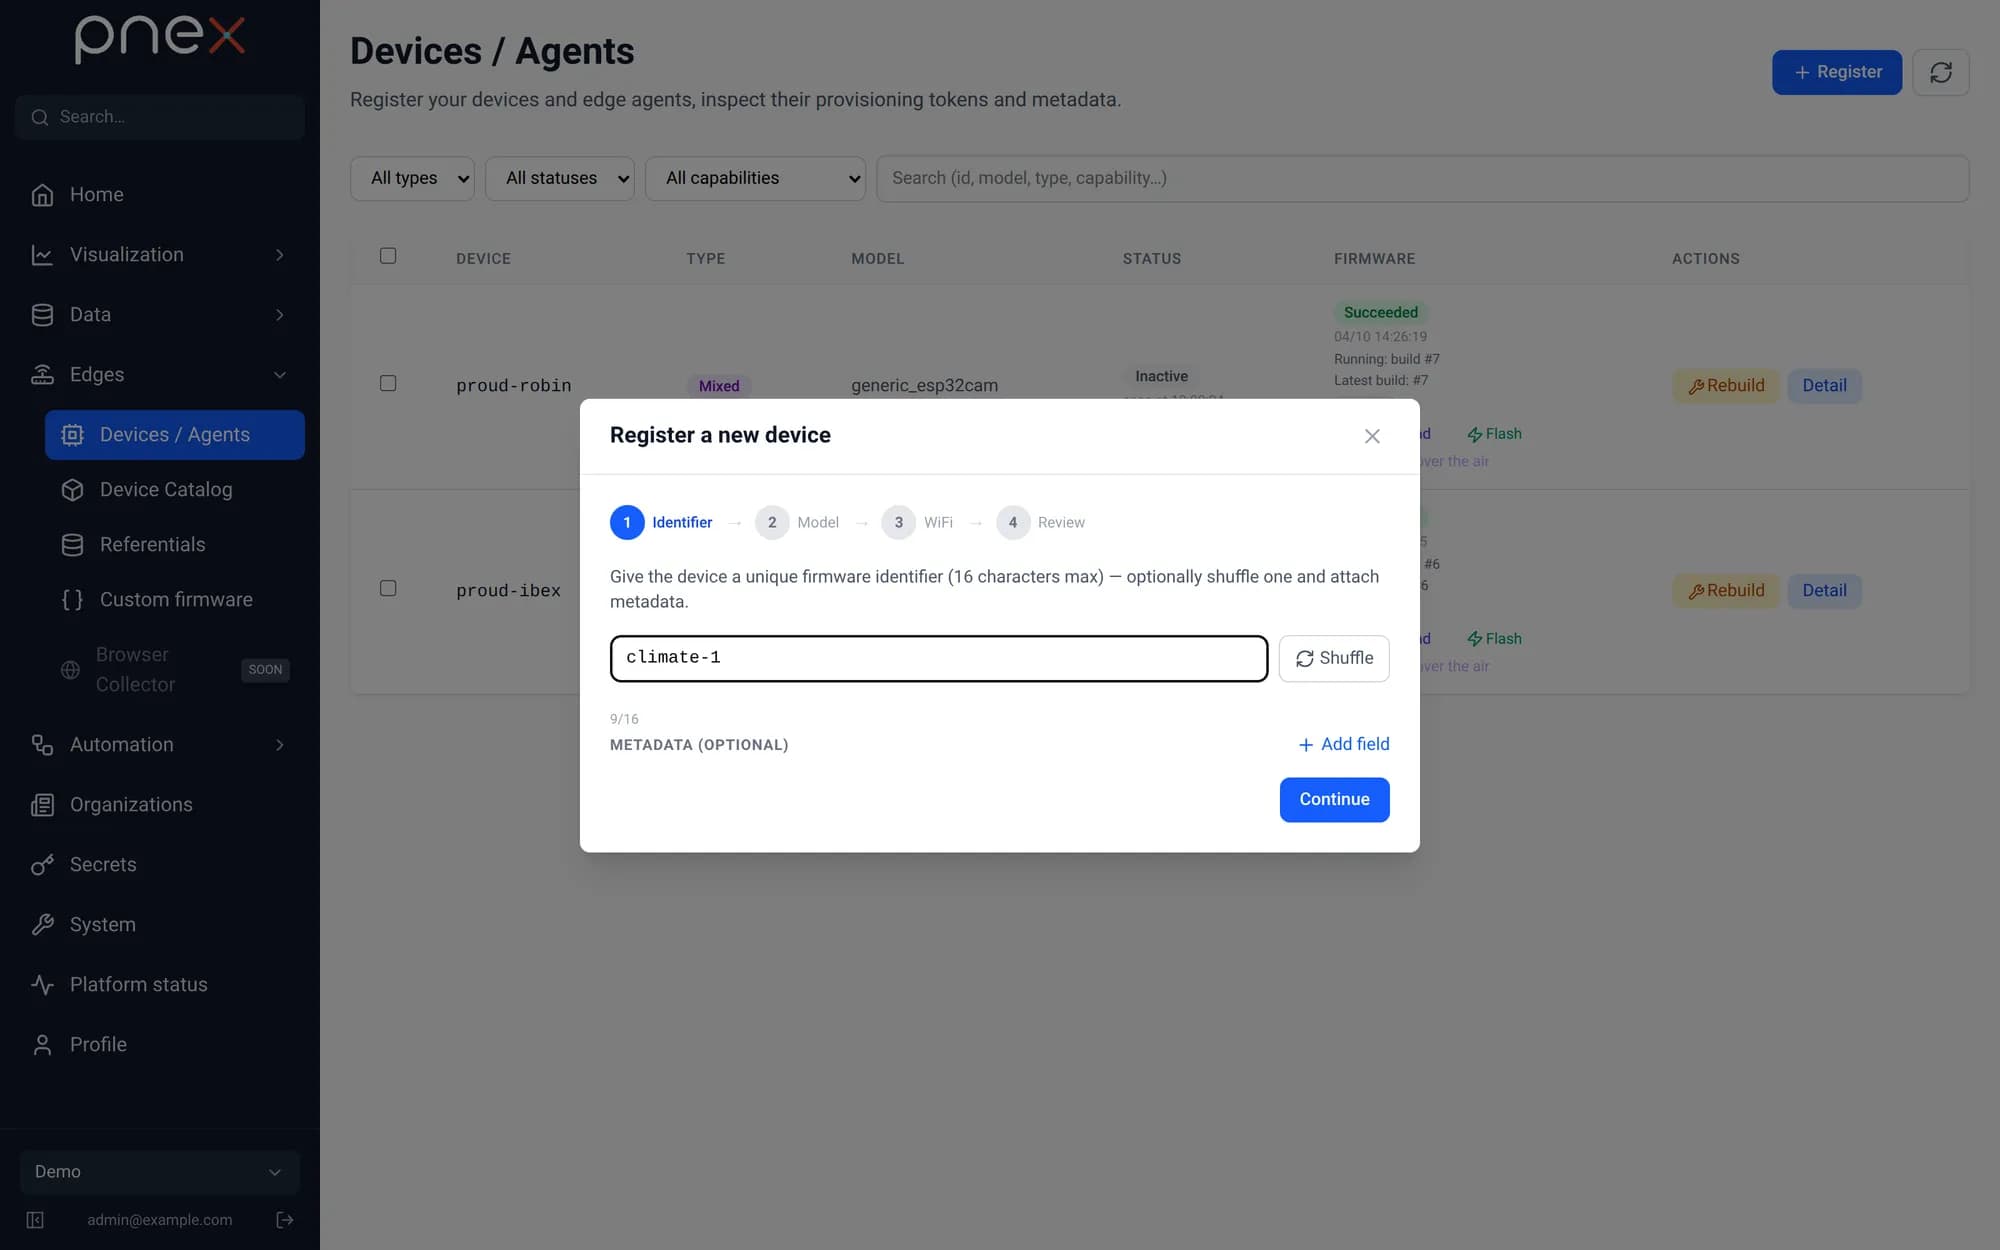
Open Edges → Devices / Agents → Register. Give the board a name, e.g. climate-1.
This name identifies the device everywhere in PNeX, flows included.
Pick the model and your firmware
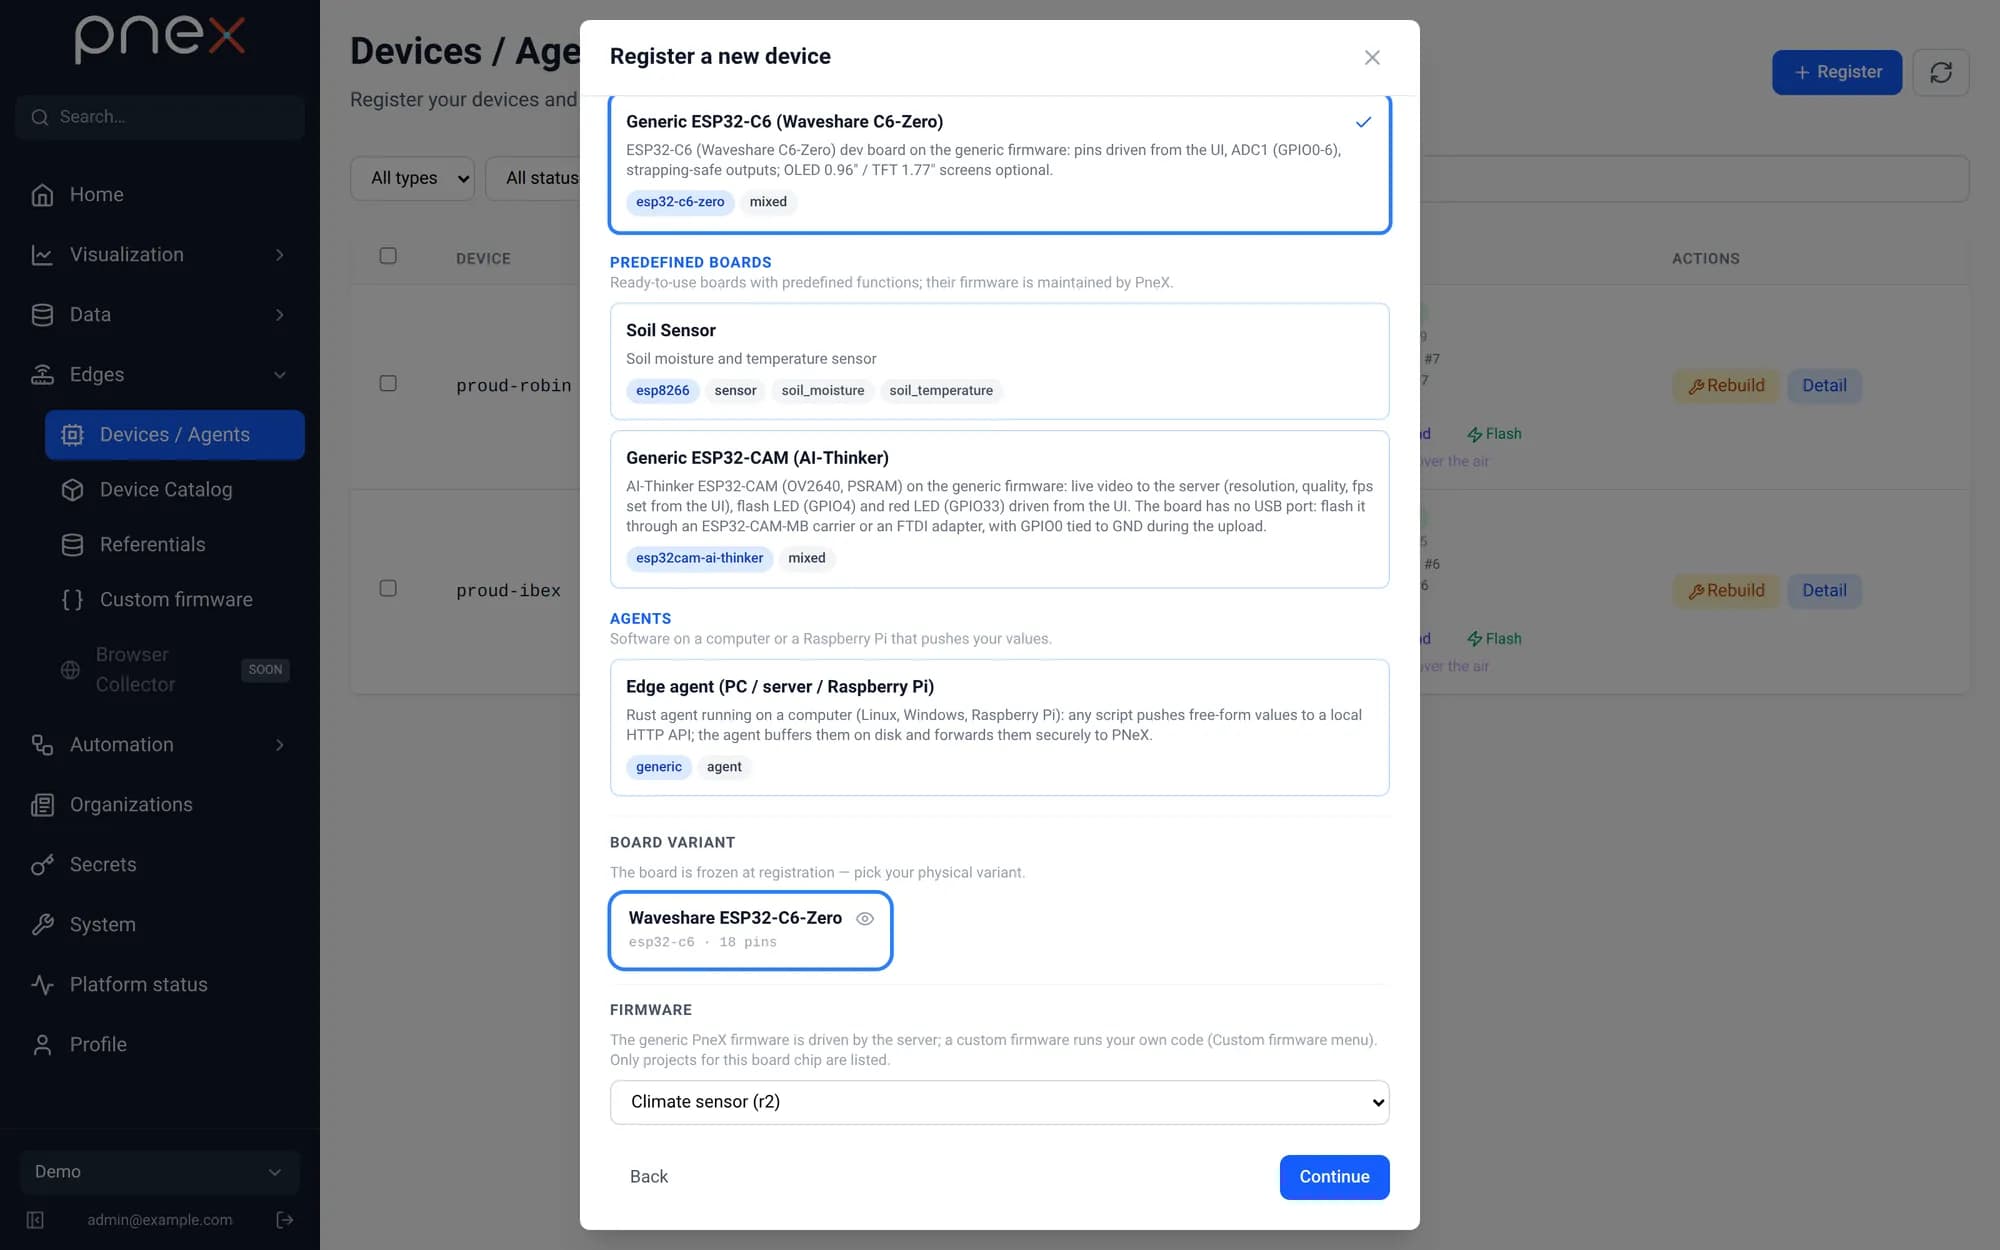
Pick Generic ESP32-C6 (Waveshare C6-Zero). Under Firmware, choose Climate sensor instead of the generic PNeX firmware.
Wi-Fi network
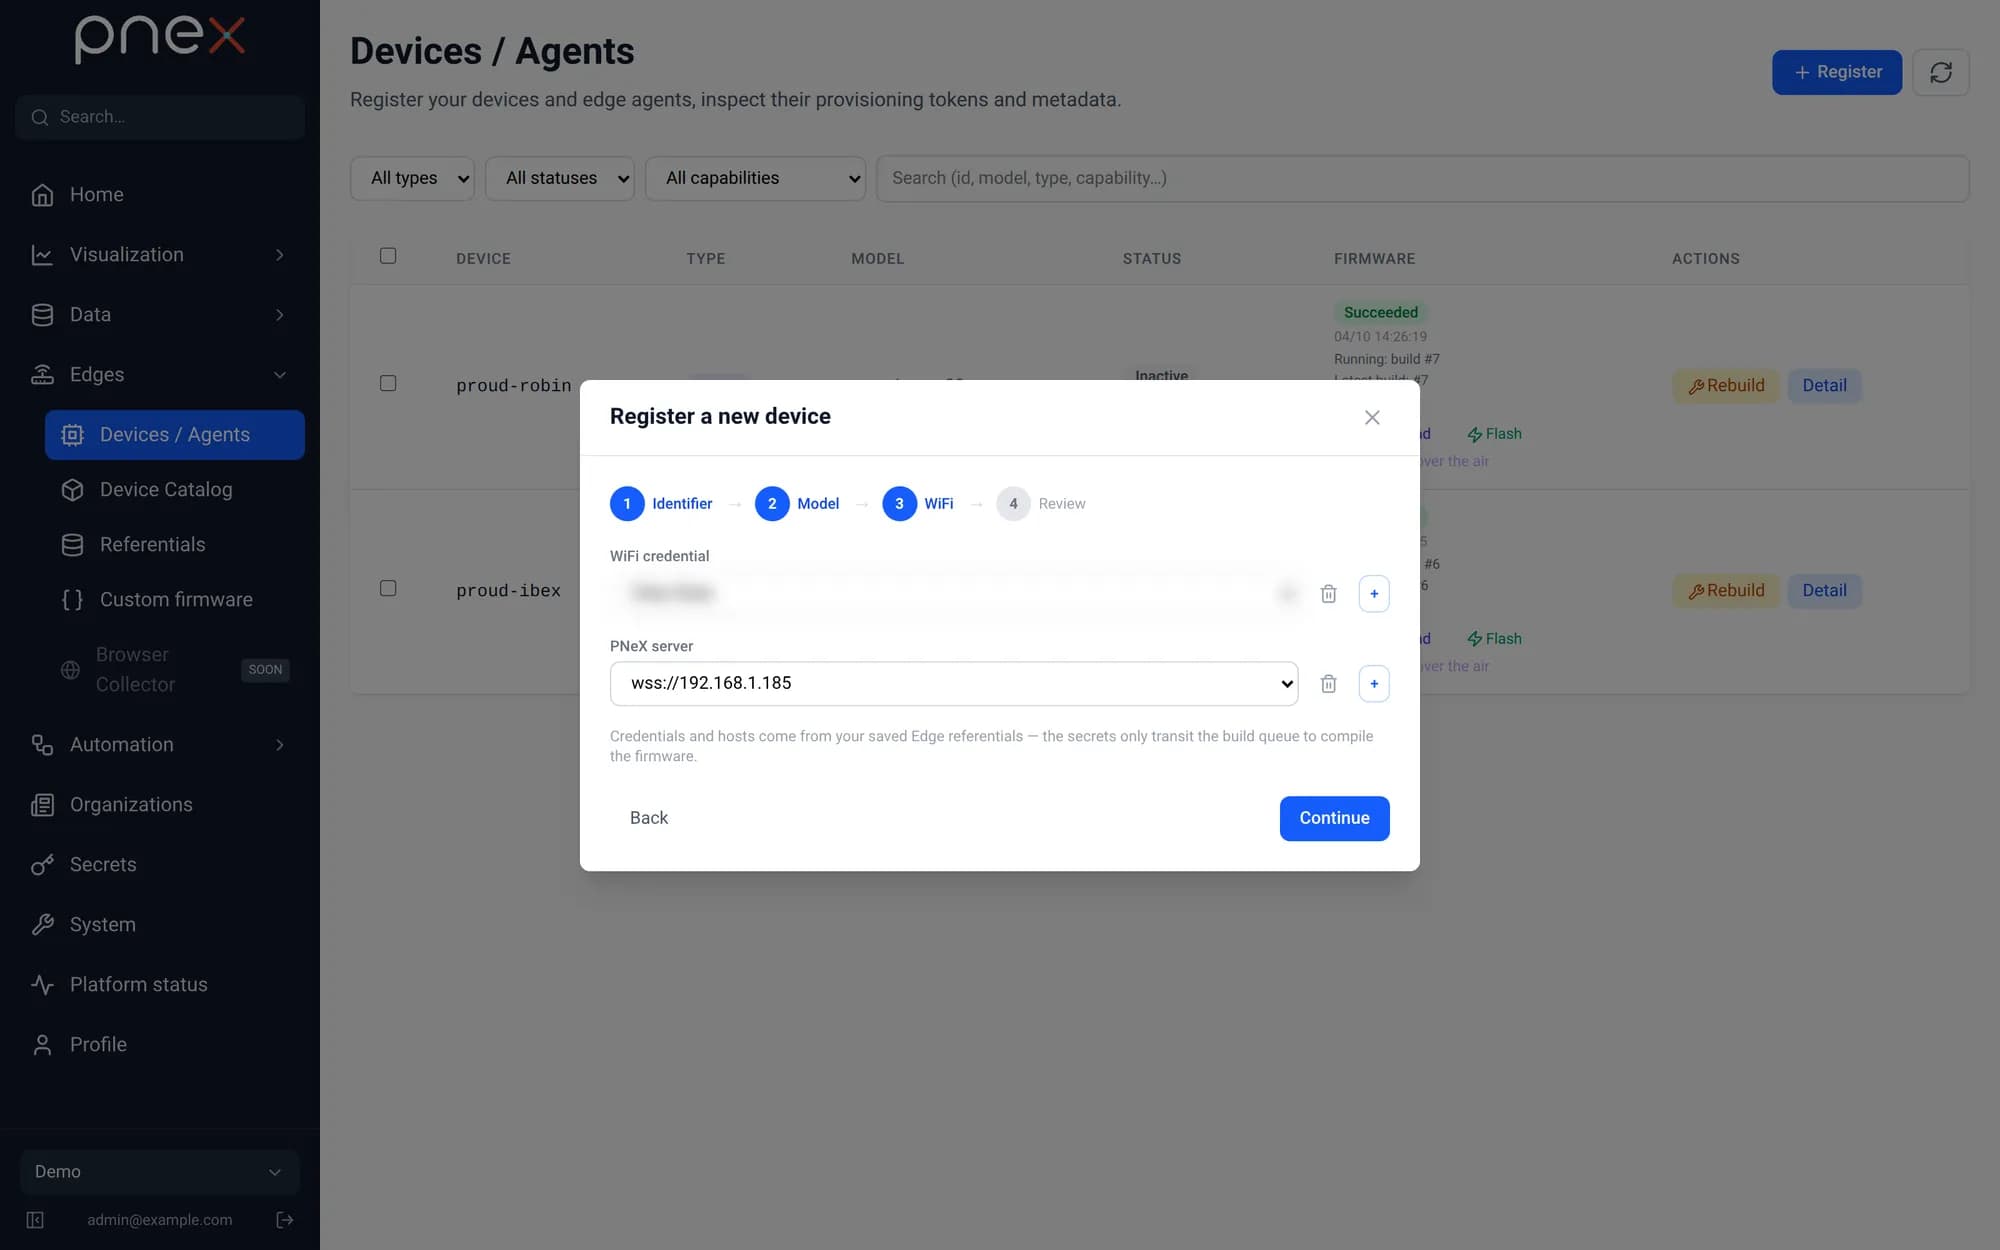
Pick your Wi-Fi network, or click + to add one: SSID and password. Use a 2.4 GHz network: ESP boards do not see 5 GHz networks.
Wi-Fi networks you add are saved in Edges → Referentials and offered again for your next boards. The password is only used to compile the firmware.
PNeX server address
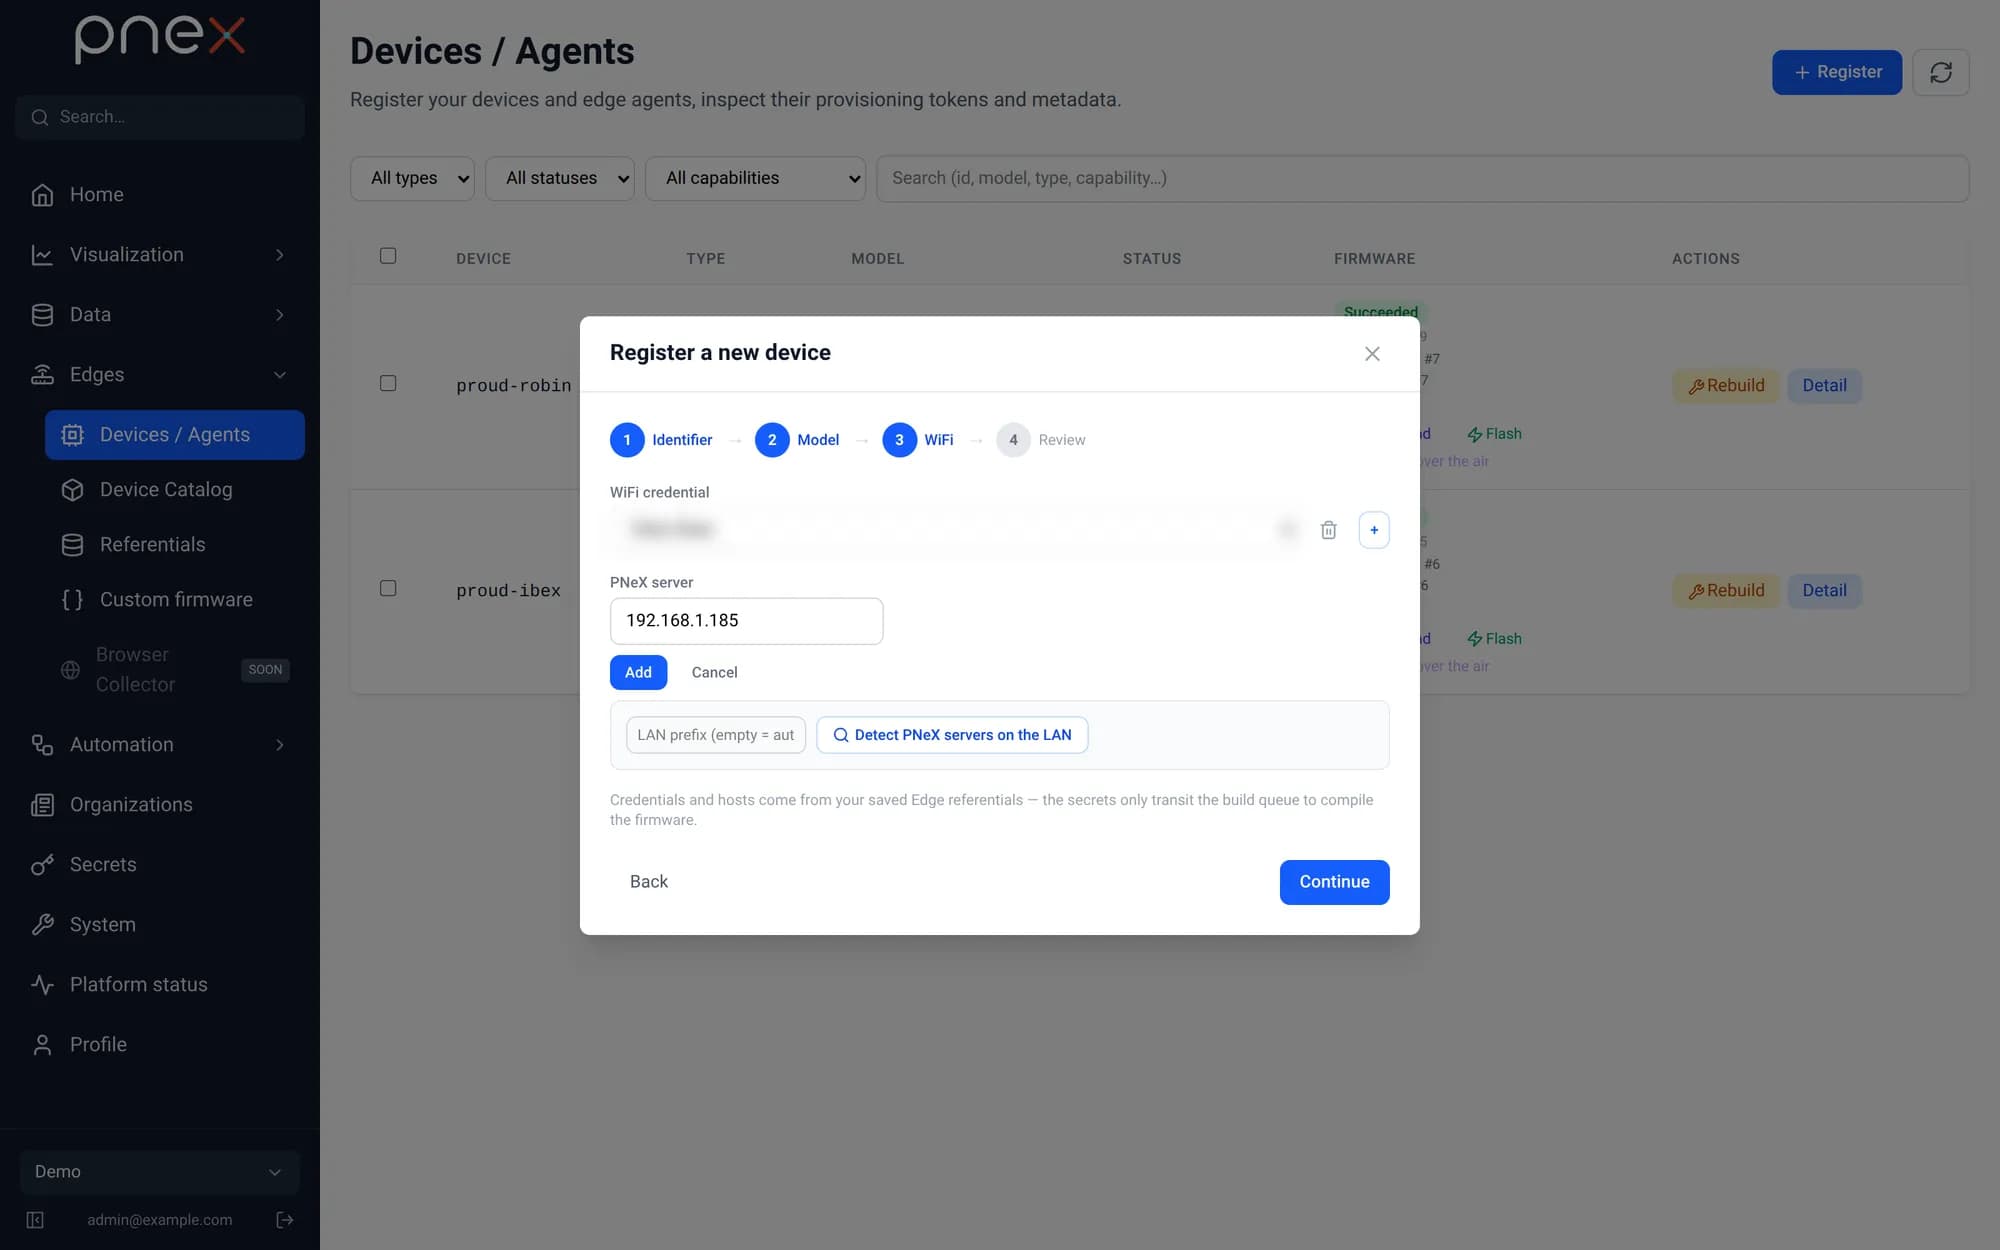
The board needs the address of your PNeX server. If PNeX server is empty, click the + next to it: the field is pre-filled with the address you are using right now. Click Add. Detect PNeX servers on the LAN finds the server for you if you are not sure.
With an install on pnex.local, the board connects to the Pi's IP address
(e.g. 192.168.1.20): ESP boards cannot resolve .local names. If you installed PNeX
with a real domain name, this field is fixed and there is nothing to choose.
Create and build
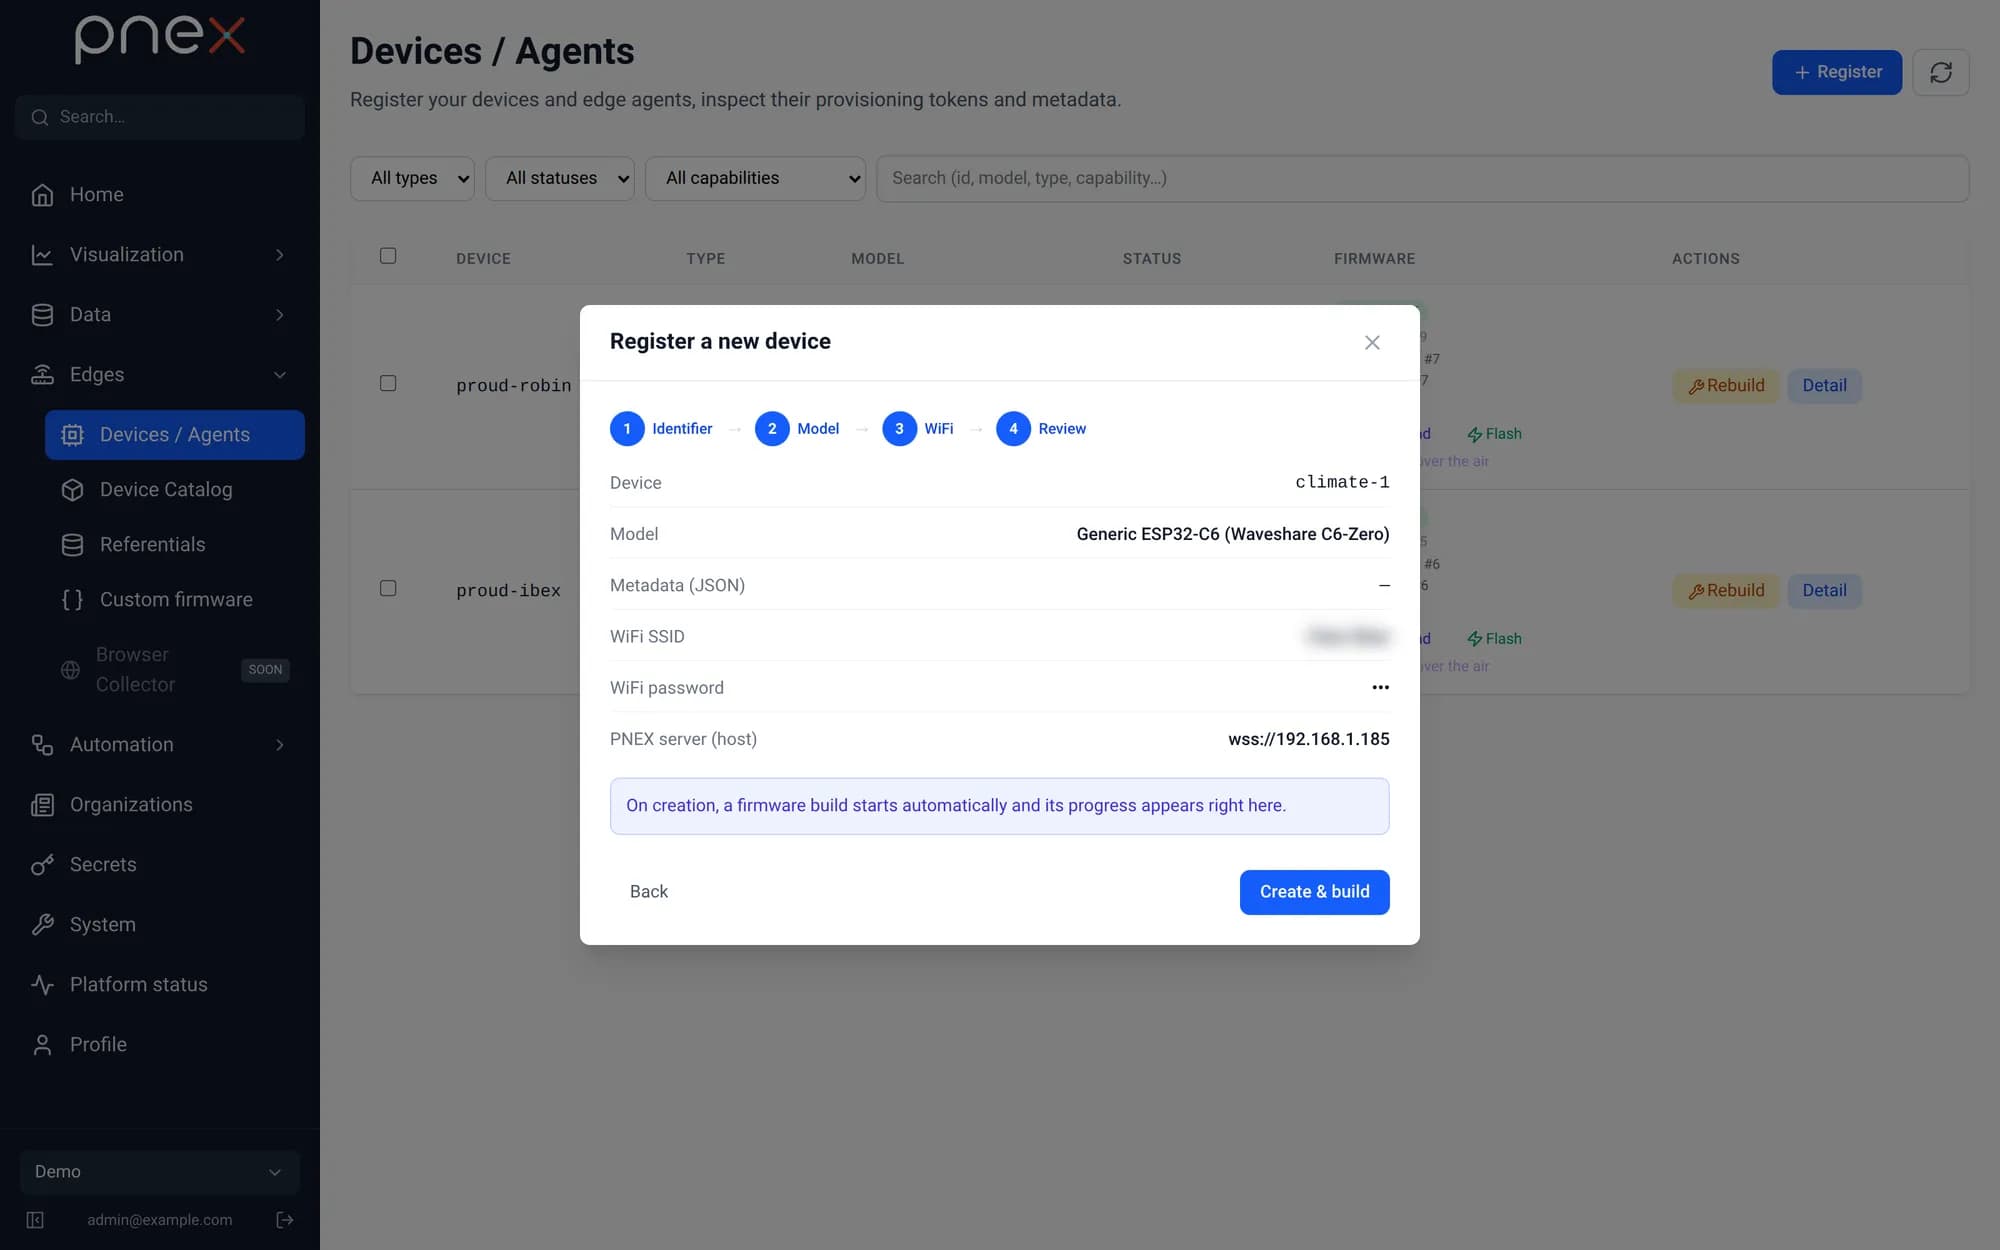
Check the summary and click Create & build. PNeX compiles a firmware for this board: your code, plus its Wi-Fi, server address and keys.
Flash from the browser
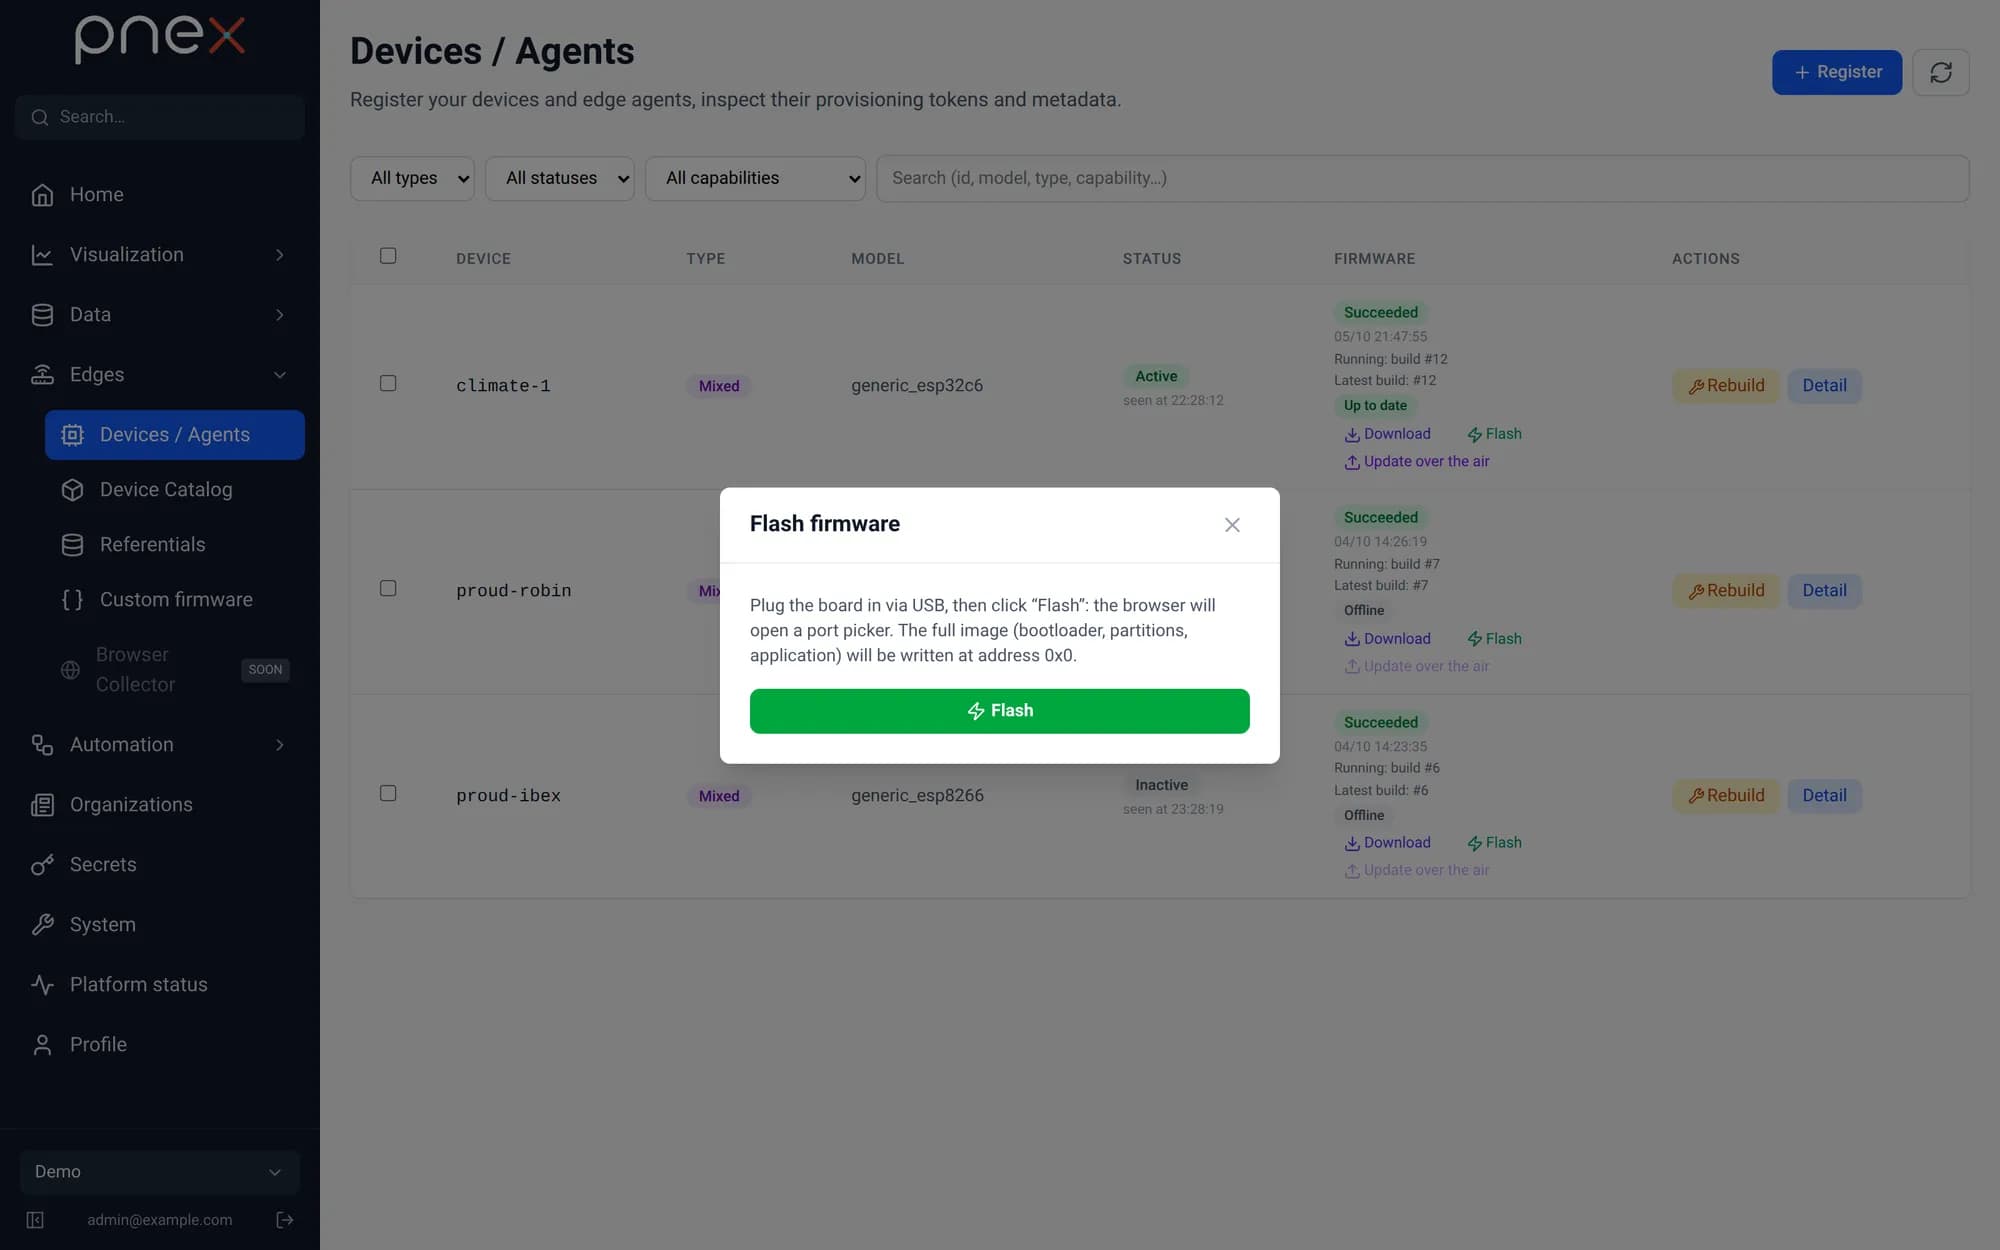
Plug the board into your computer with a USB data cable. In the device row, click Flash, then Flash again and pick the board's port. It shows up as a USB serial or "USB JTAG/serial debug unit" device.
Use Chrome, Edge or another Chromium browser: flashing uses Web Serial. If no port shows up, hold the BOOT button, press and release RESET, then release BOOT, and try again.
You only flash over USB once. Later versions of your code are installed over the air with Update over the air.
Watch the readings
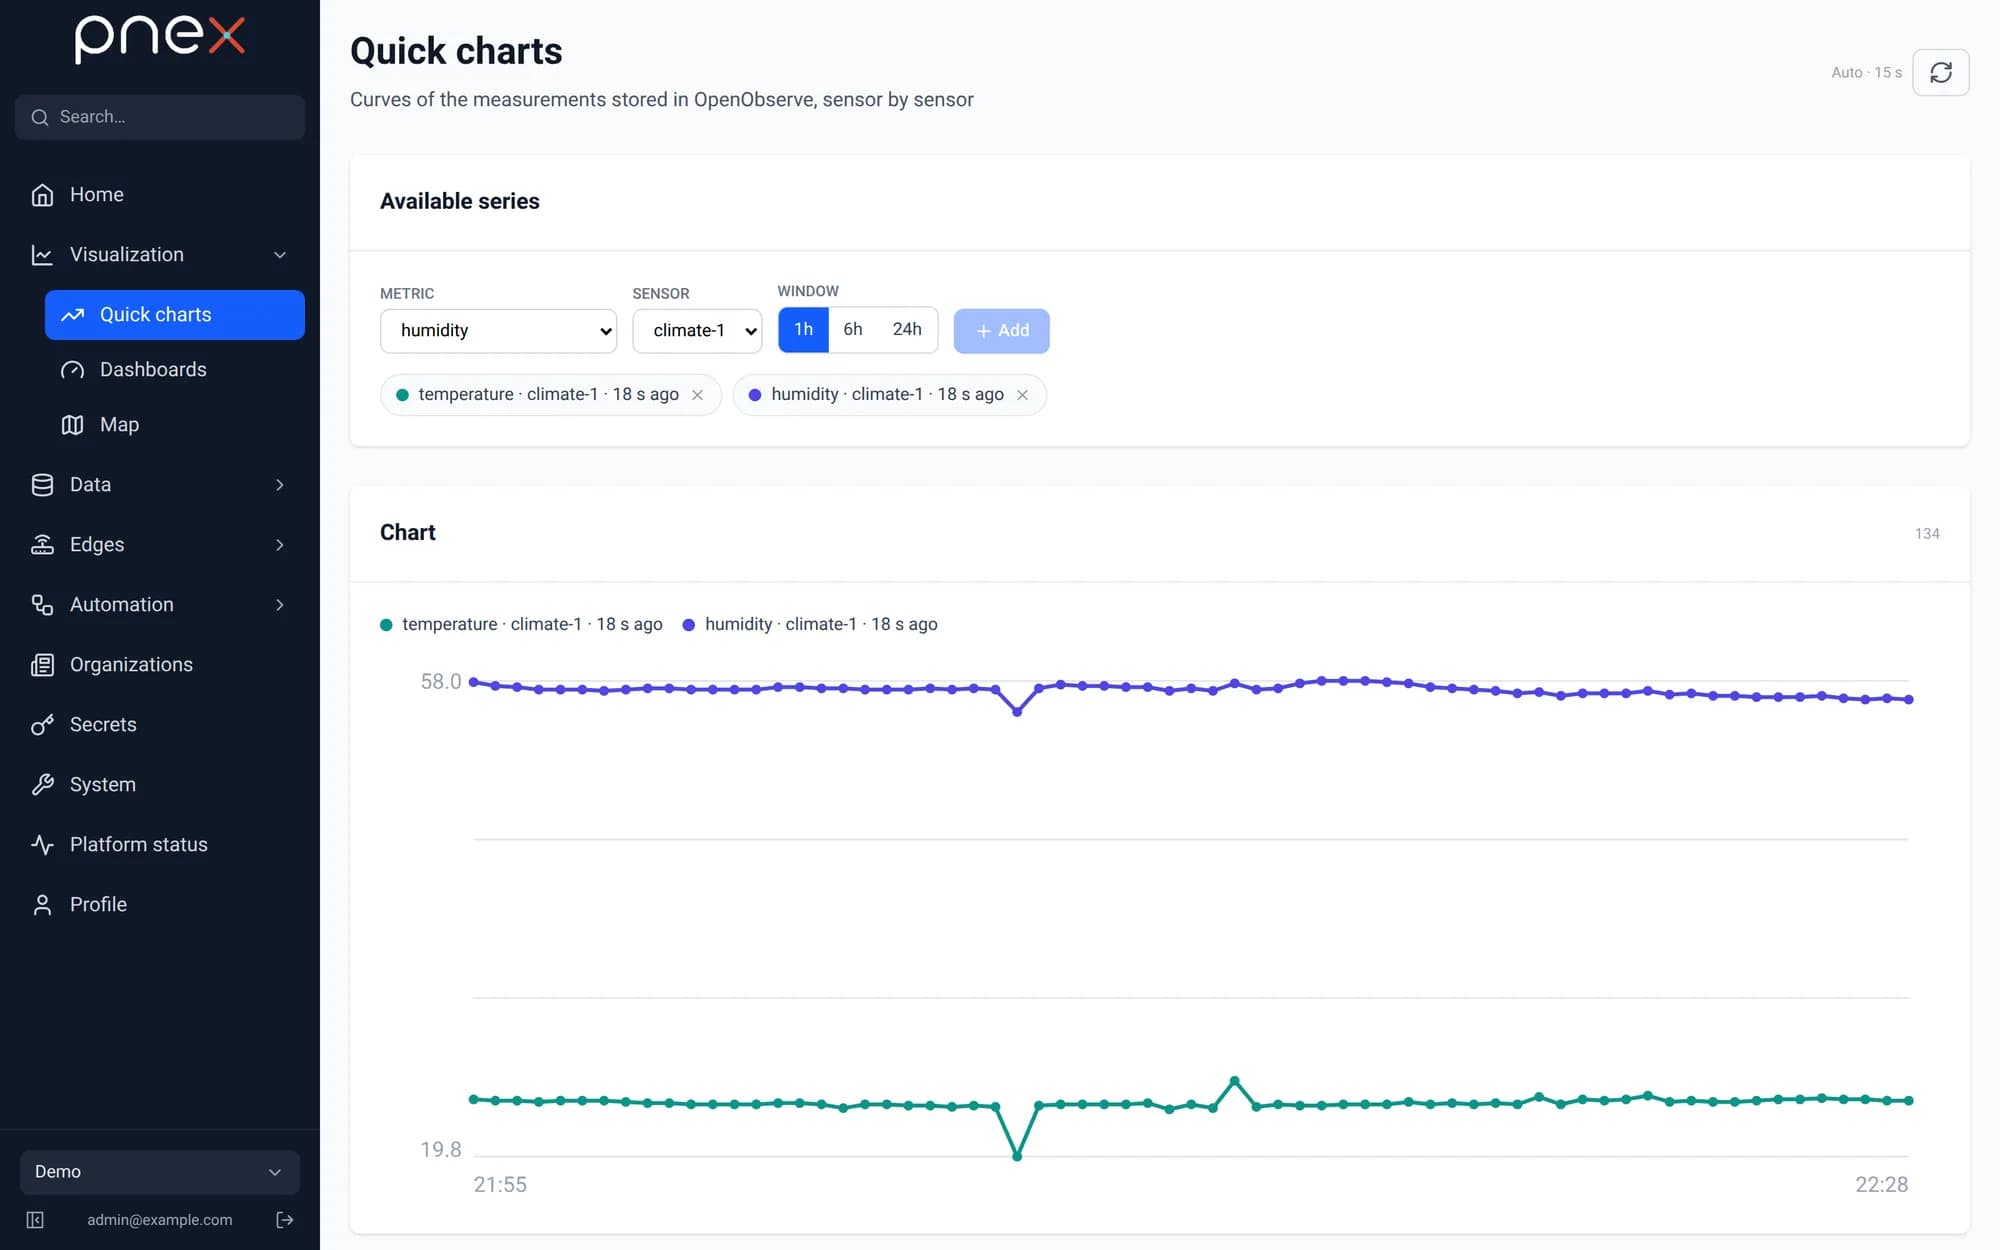
Open Visualization → Quick charts. Pick the metric temperature, the sensor
climate-1, click Add, then do the same for humidity.
A new point arrives every 10 seconds. Breathe on the sensor: the humidity jumps within a few readings.
Write the function (Python syntax)
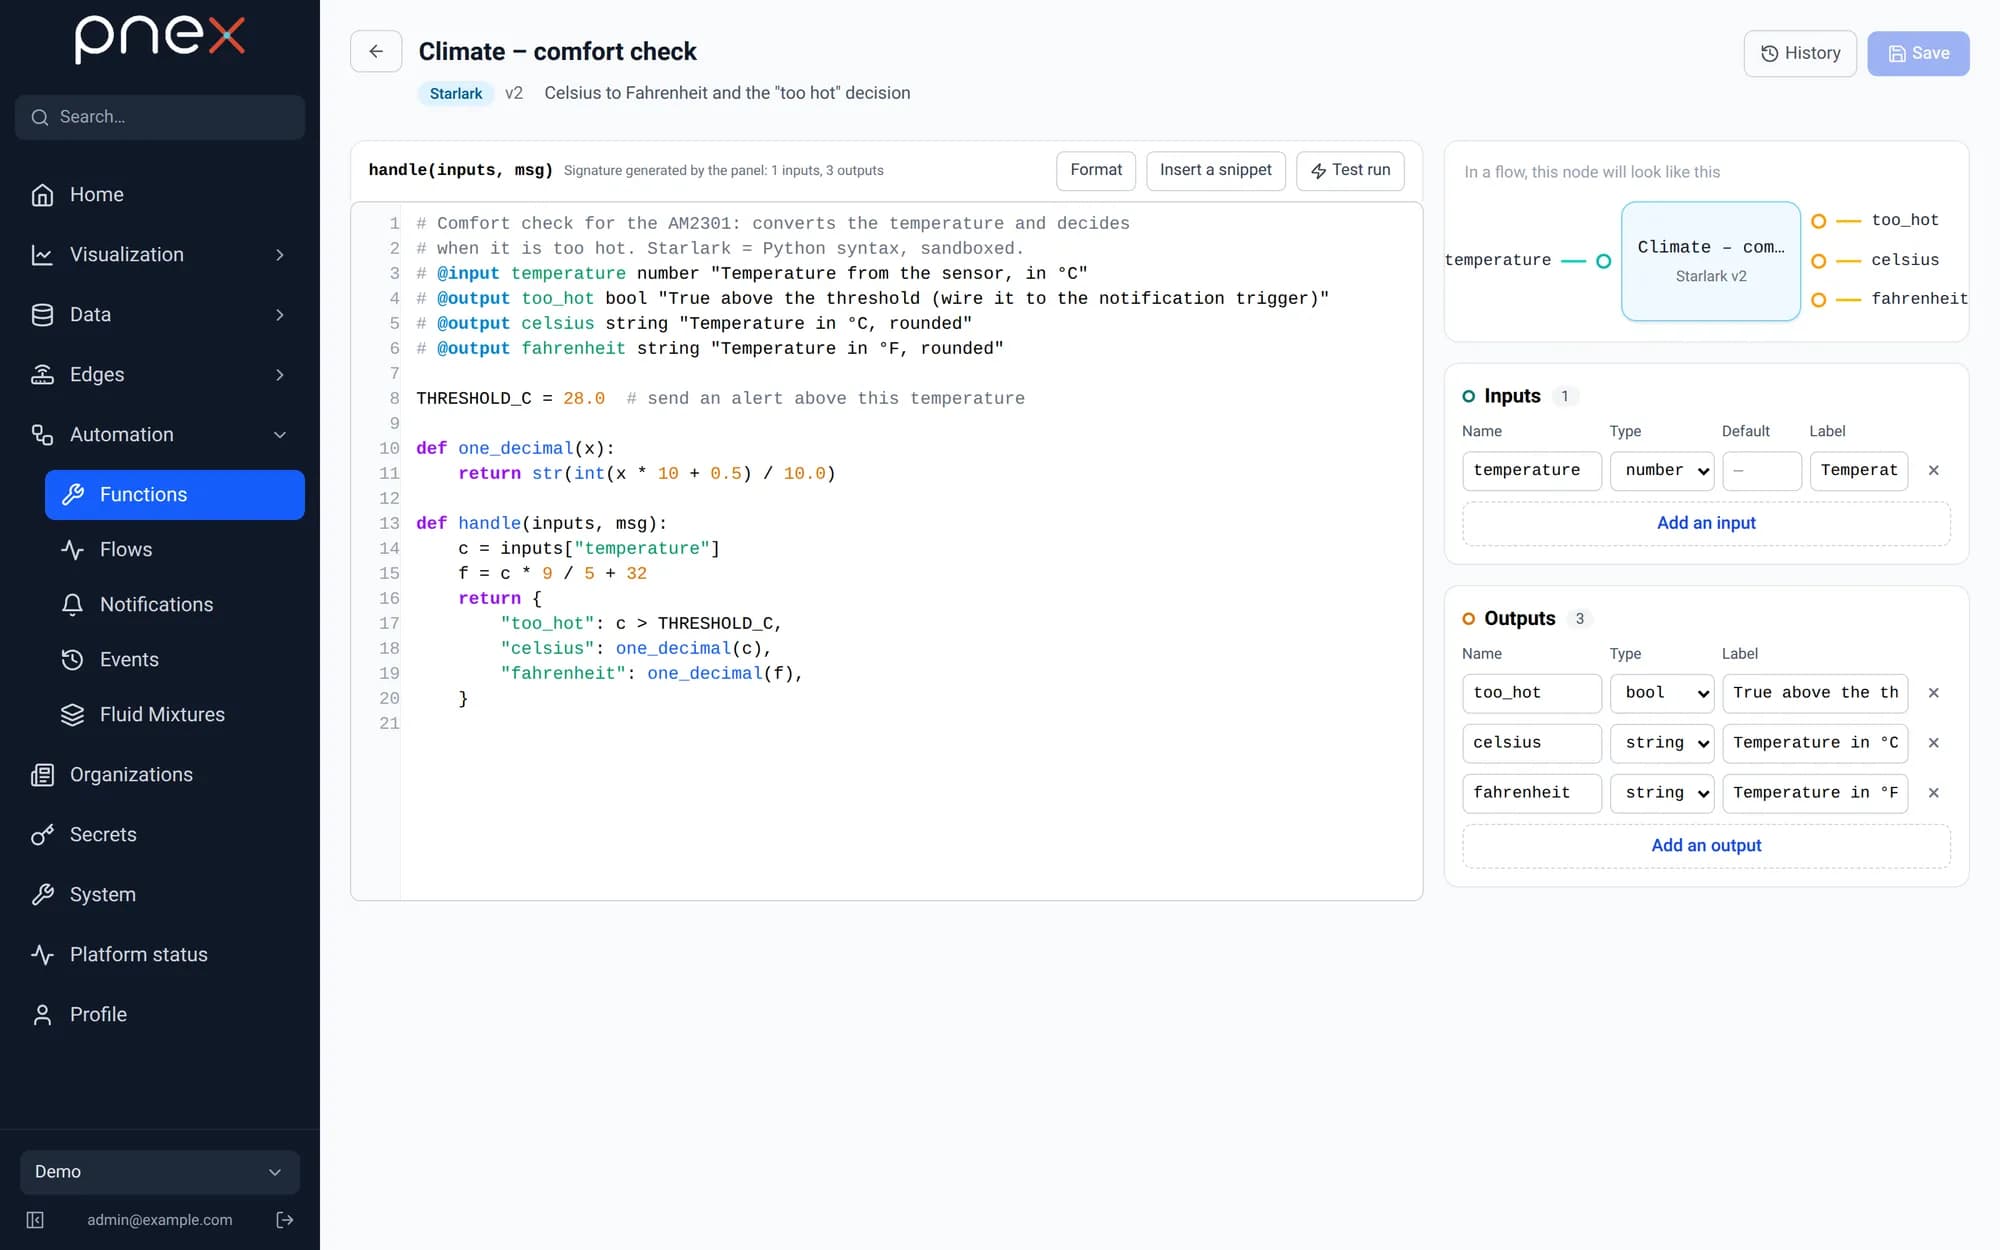
Open Automation → Functions → New function, name it Climate – comfort check,
pick Starlark and create it.
Starlark is a small language with Python syntax: def, if, dictionaries,
# comments. It runs in a sandbox, so it can only compute: no files, no network.
Paste:
# Comfort check for the AM2301: converts the temperature and decides
# when it is too hot. Starlark = Python syntax, sandboxed.
# @input temperature number "Temperature from the sensor, in °C"
# @output too_hot bool "True above the threshold (wire it to the notification trigger)"
# @output celsius string "Temperature in °C, rounded"
# @output fahrenheit string "Temperature in °F, rounded"

THRESHOLD_C = 28.0  # send an alert above this temperature

def one_decimal(x):
    return str(int(x * 10 + 0.5) / 10.0)

def handle(inputs, msg):
    c = inputs["temperature"]
    f = c * 9 / 5 + 32
    return {
        "too_hot": c > THRESHOLD_C,
        "celsius": one_decimal(c),
        "fahrenheit": one_decimal(f),
    }
The @input and @output lines are not plain comments. Each @input becomes an
input of the function node in the flow, and each @output becomes an output.
handle returns one value per output, under the same name.
Click Save.
Test the function
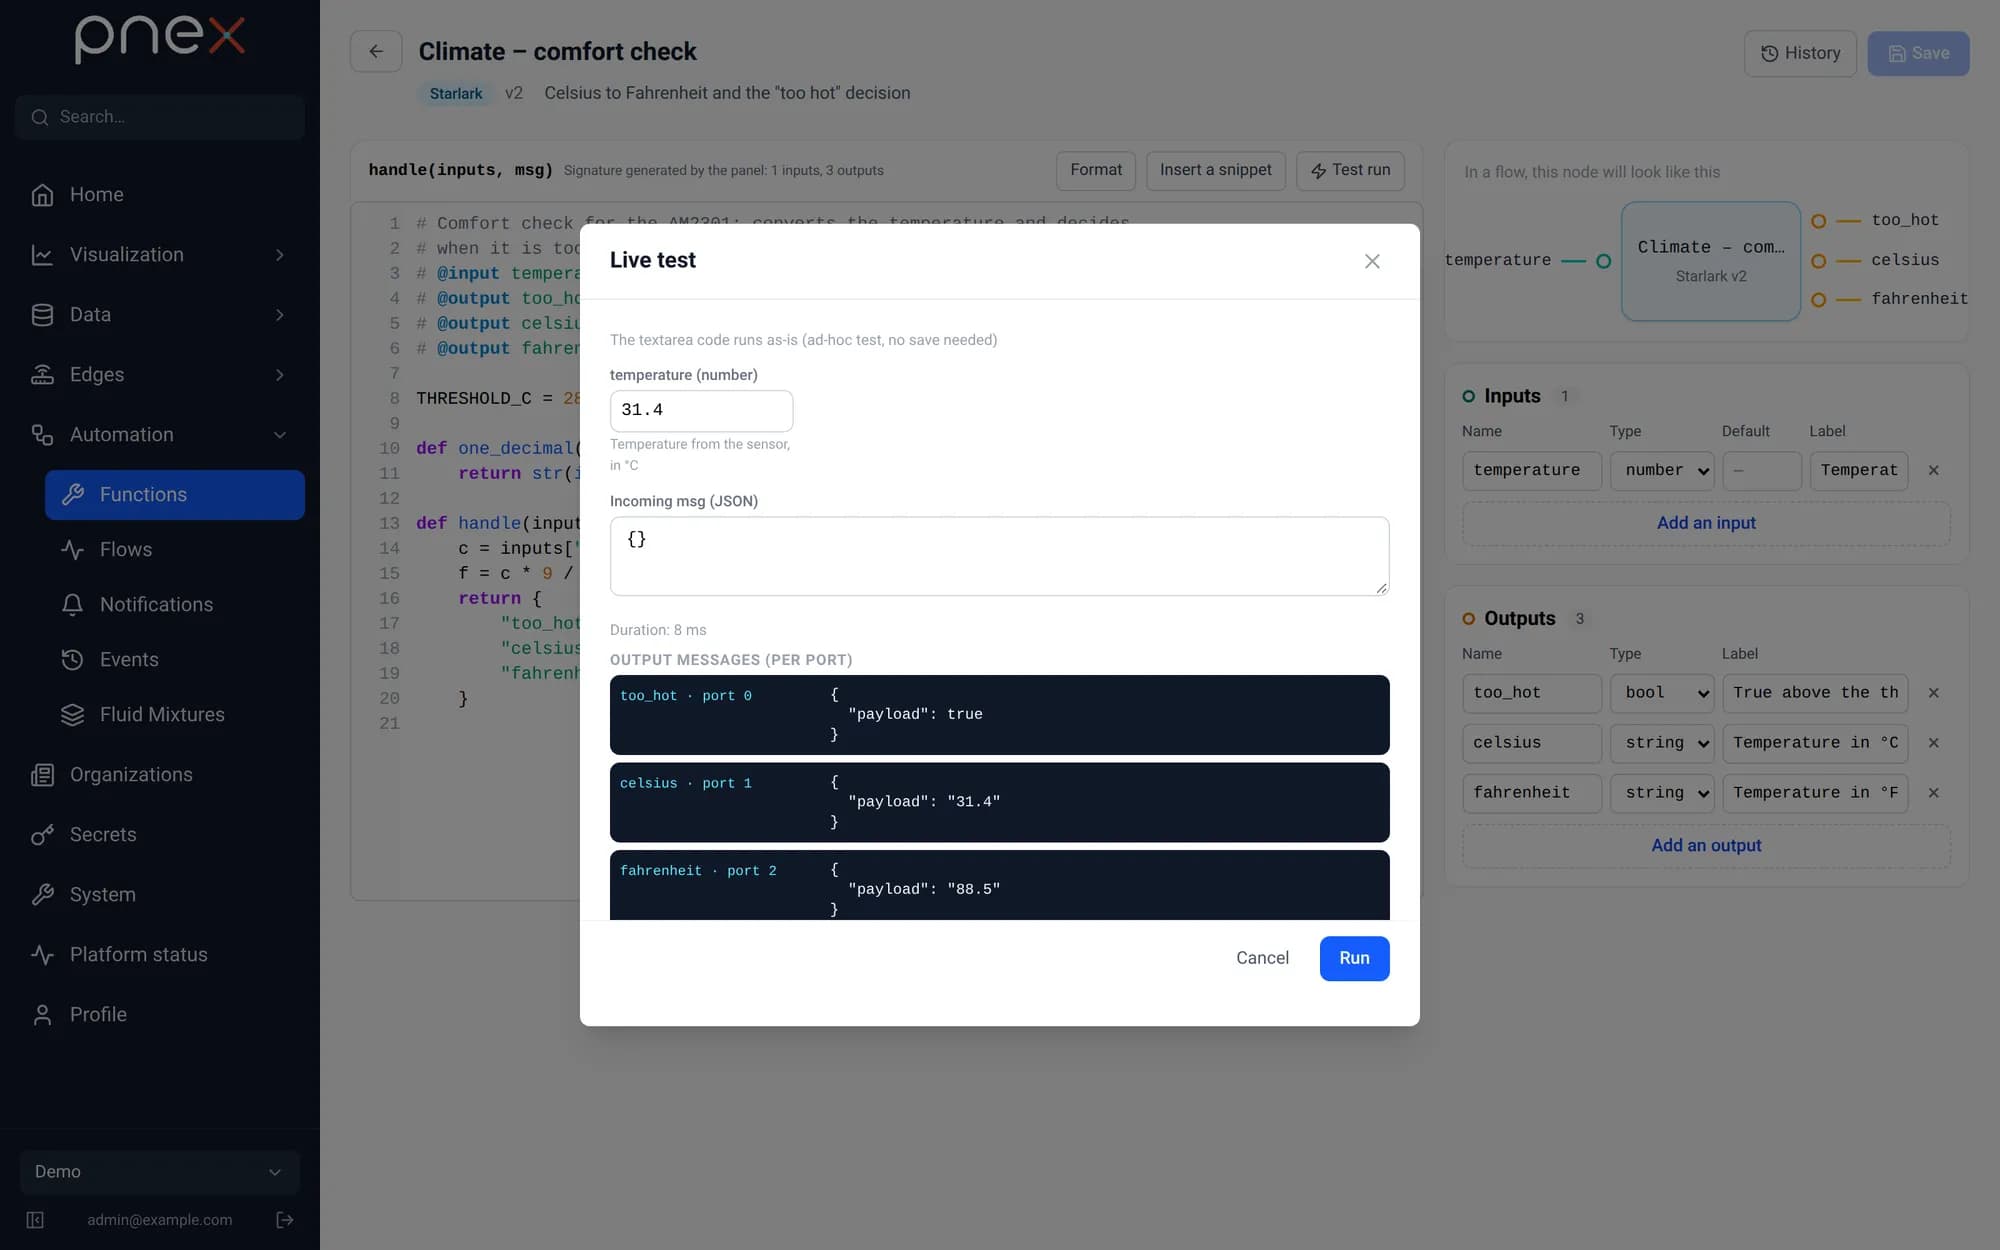
Click Test run, type 31.4 for temperature and click Run.
too_hot = true, celsius = "31.4" and fahrenheit = "88.5".Change THRESHOLD_C to the temperature that matters for you, a greenhouse, a server
cupboard or a baby's room, and save again.
Add your phone as a channel
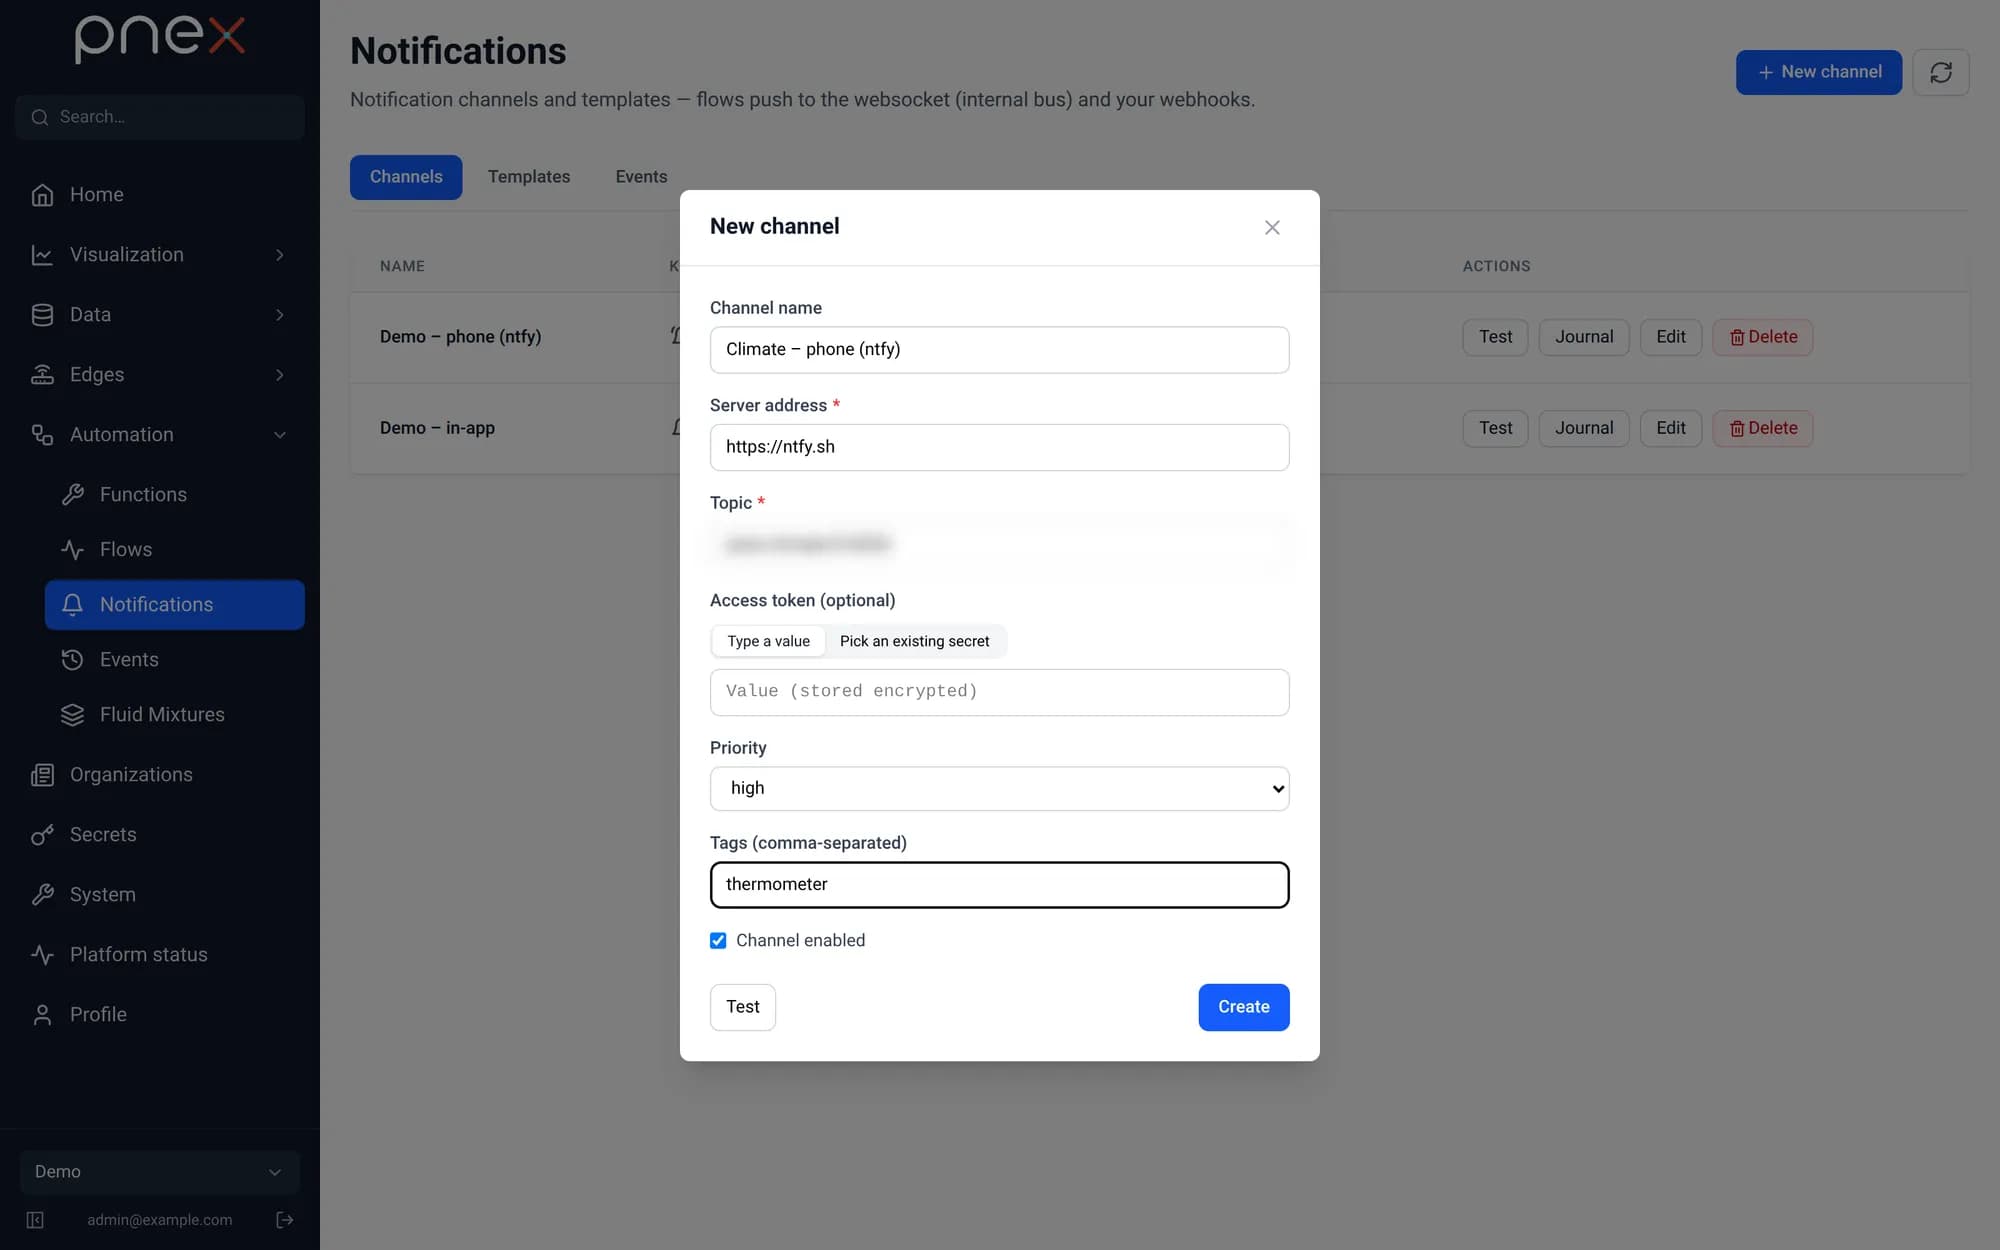
Install the ntfy app on your phone and subscribe to a topic with a hard-to-guess
name: pnex-climate- followed by a few random letters and digits of your own. Anyone
who knows the topic name can read it, so never reuse one from a tutorial.
In PNeX, open Automation → Notifications → New channel → ntfy: server
https://ntfy.sh, the same topic, then Create. Use the Test button of
the channel: a test message pops up on your phone.
Email, Telegram, Slack or Discord work the same way. See Get alerts by email or on your phone.
Write the message
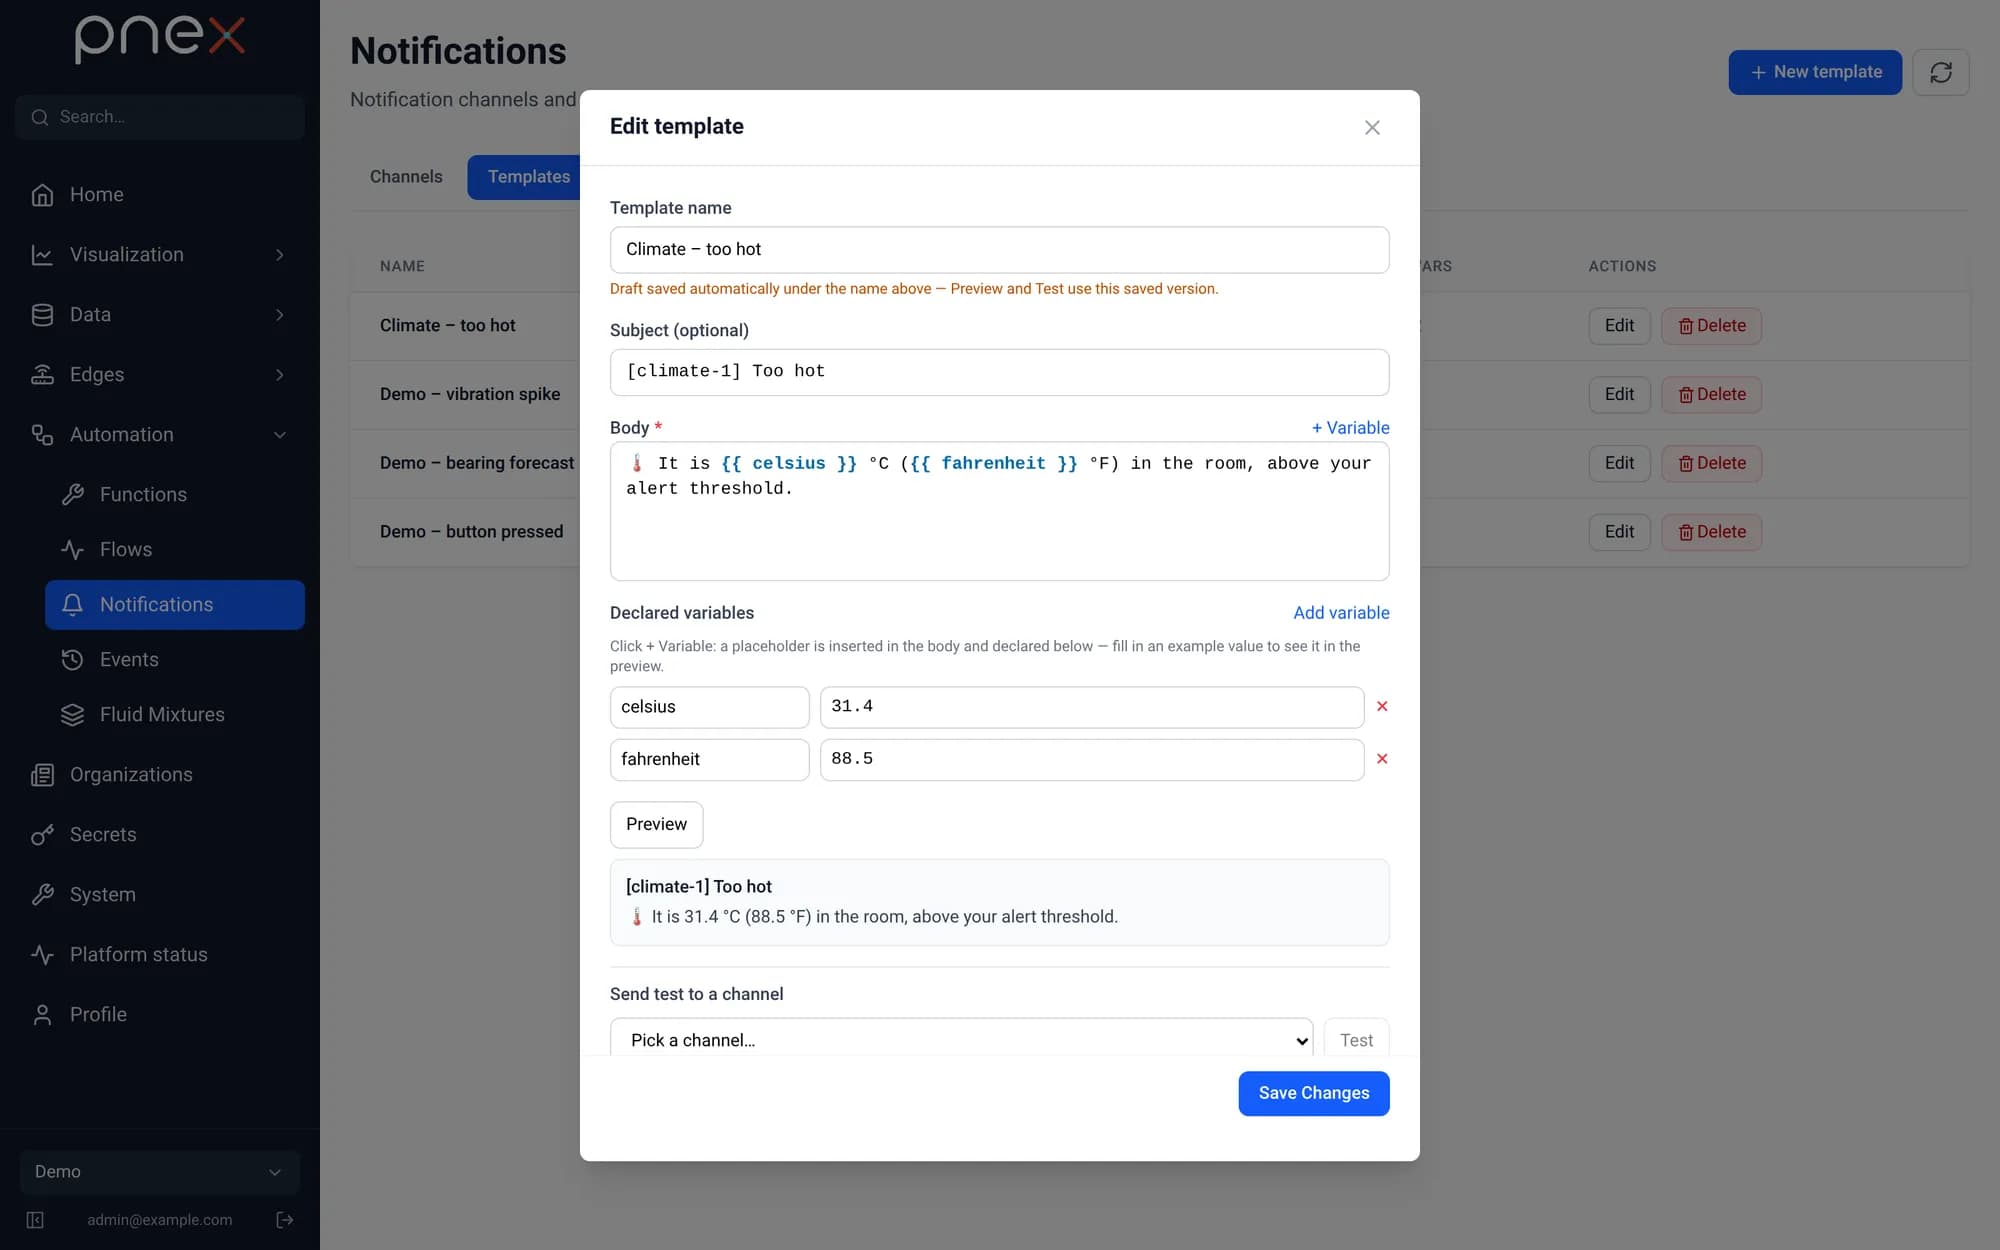
Open the Templates tab, then New template:
- Name:
Climate – too hot - Subject:
[climate-1] Too hot - Body:
🌡️ It is {{ celsius }} °C ({{ fahrenheit }} °F) in the room, above your alert threshold.Declare the two variables celsius and fahrenheit (Add variable), give them
example values and click Preview.
Send a test message
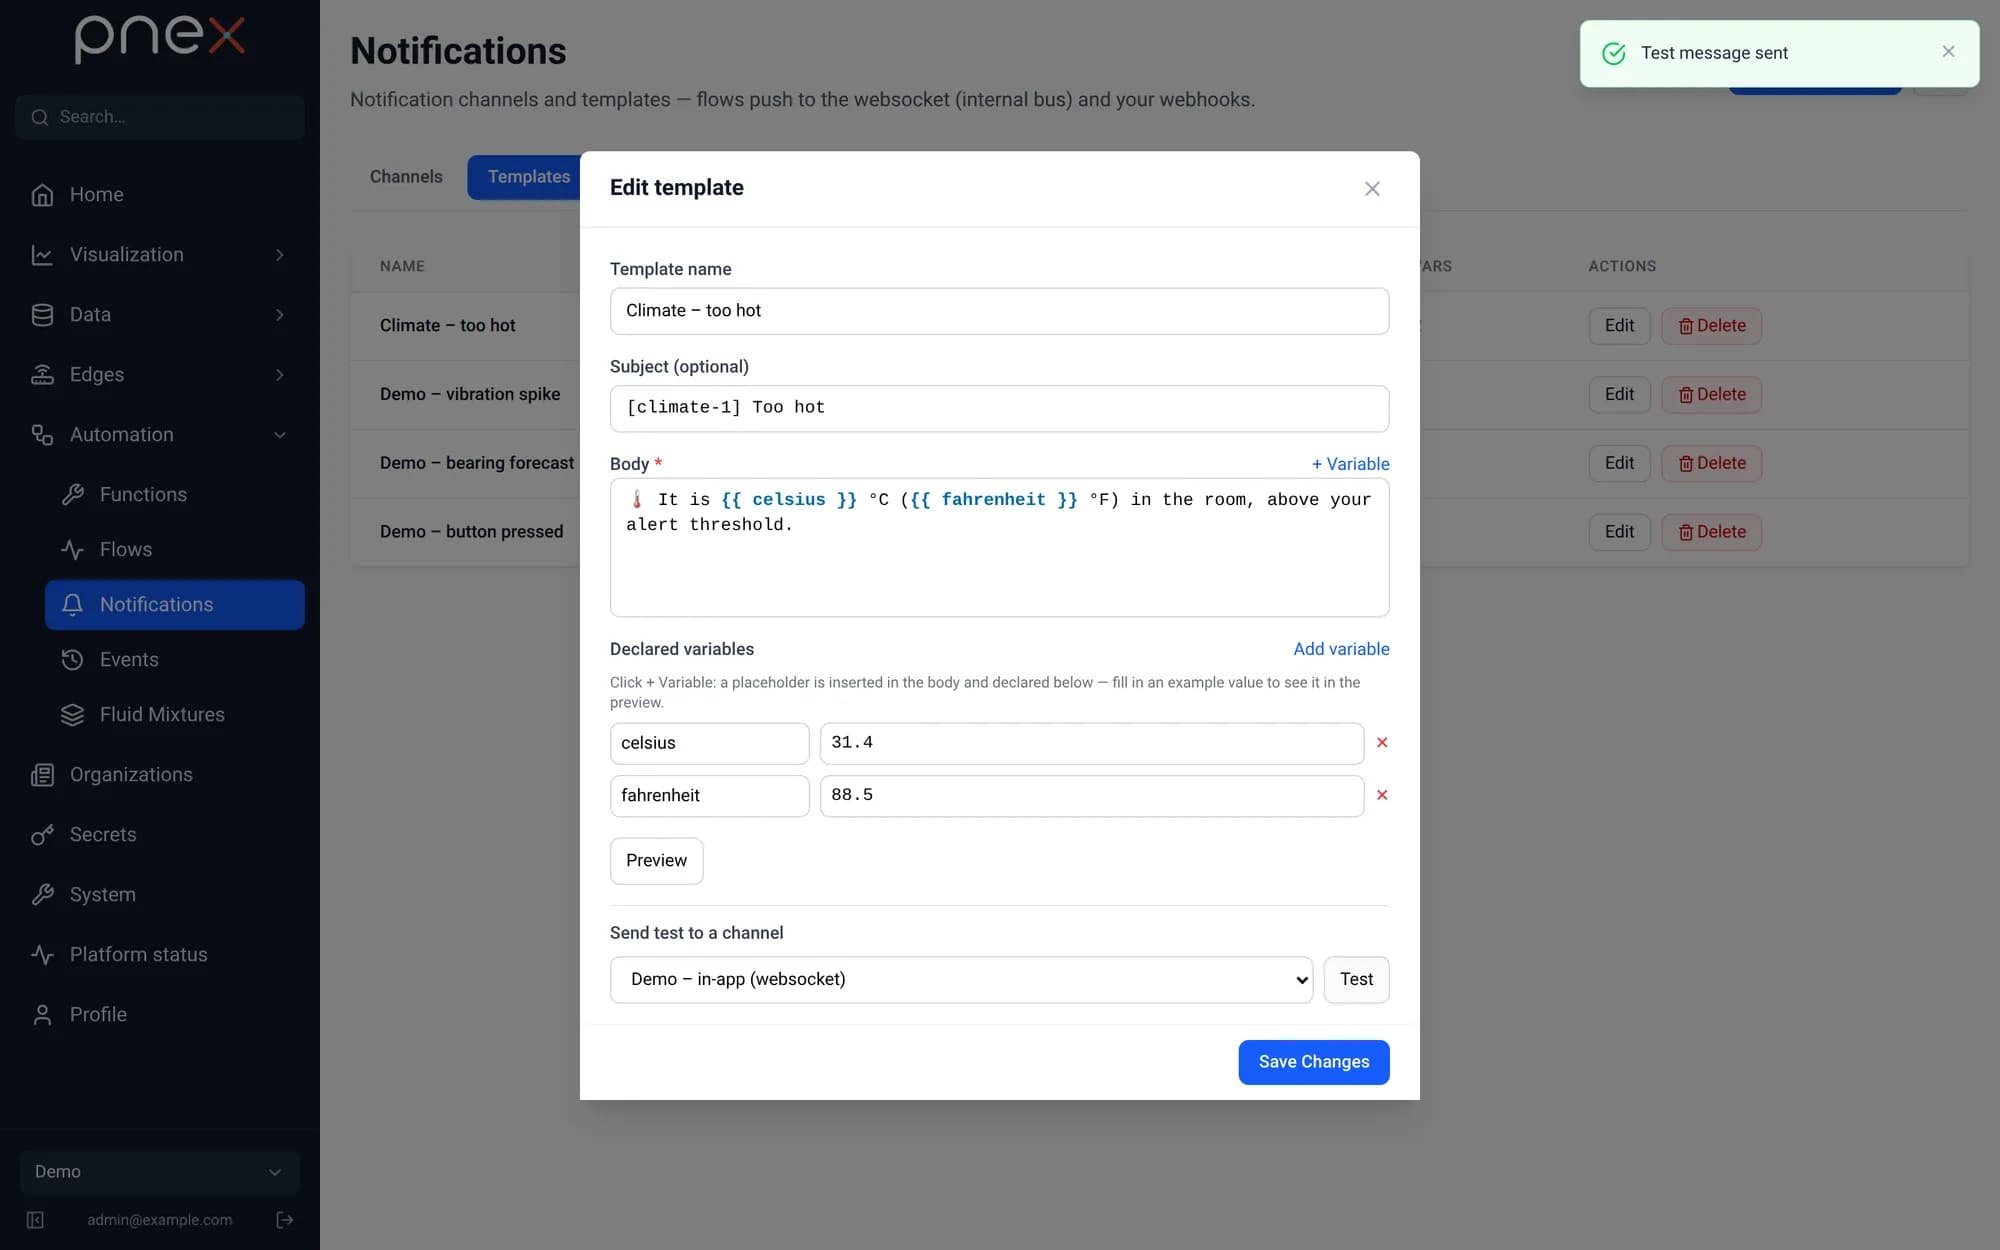
At the bottom of the template, Send test to a channel renders the template with the example values and sends it right away. Pick your ntfy channel and click Test: the message pops up on your phone. Then click Save changes.
Read the sensor in a flow
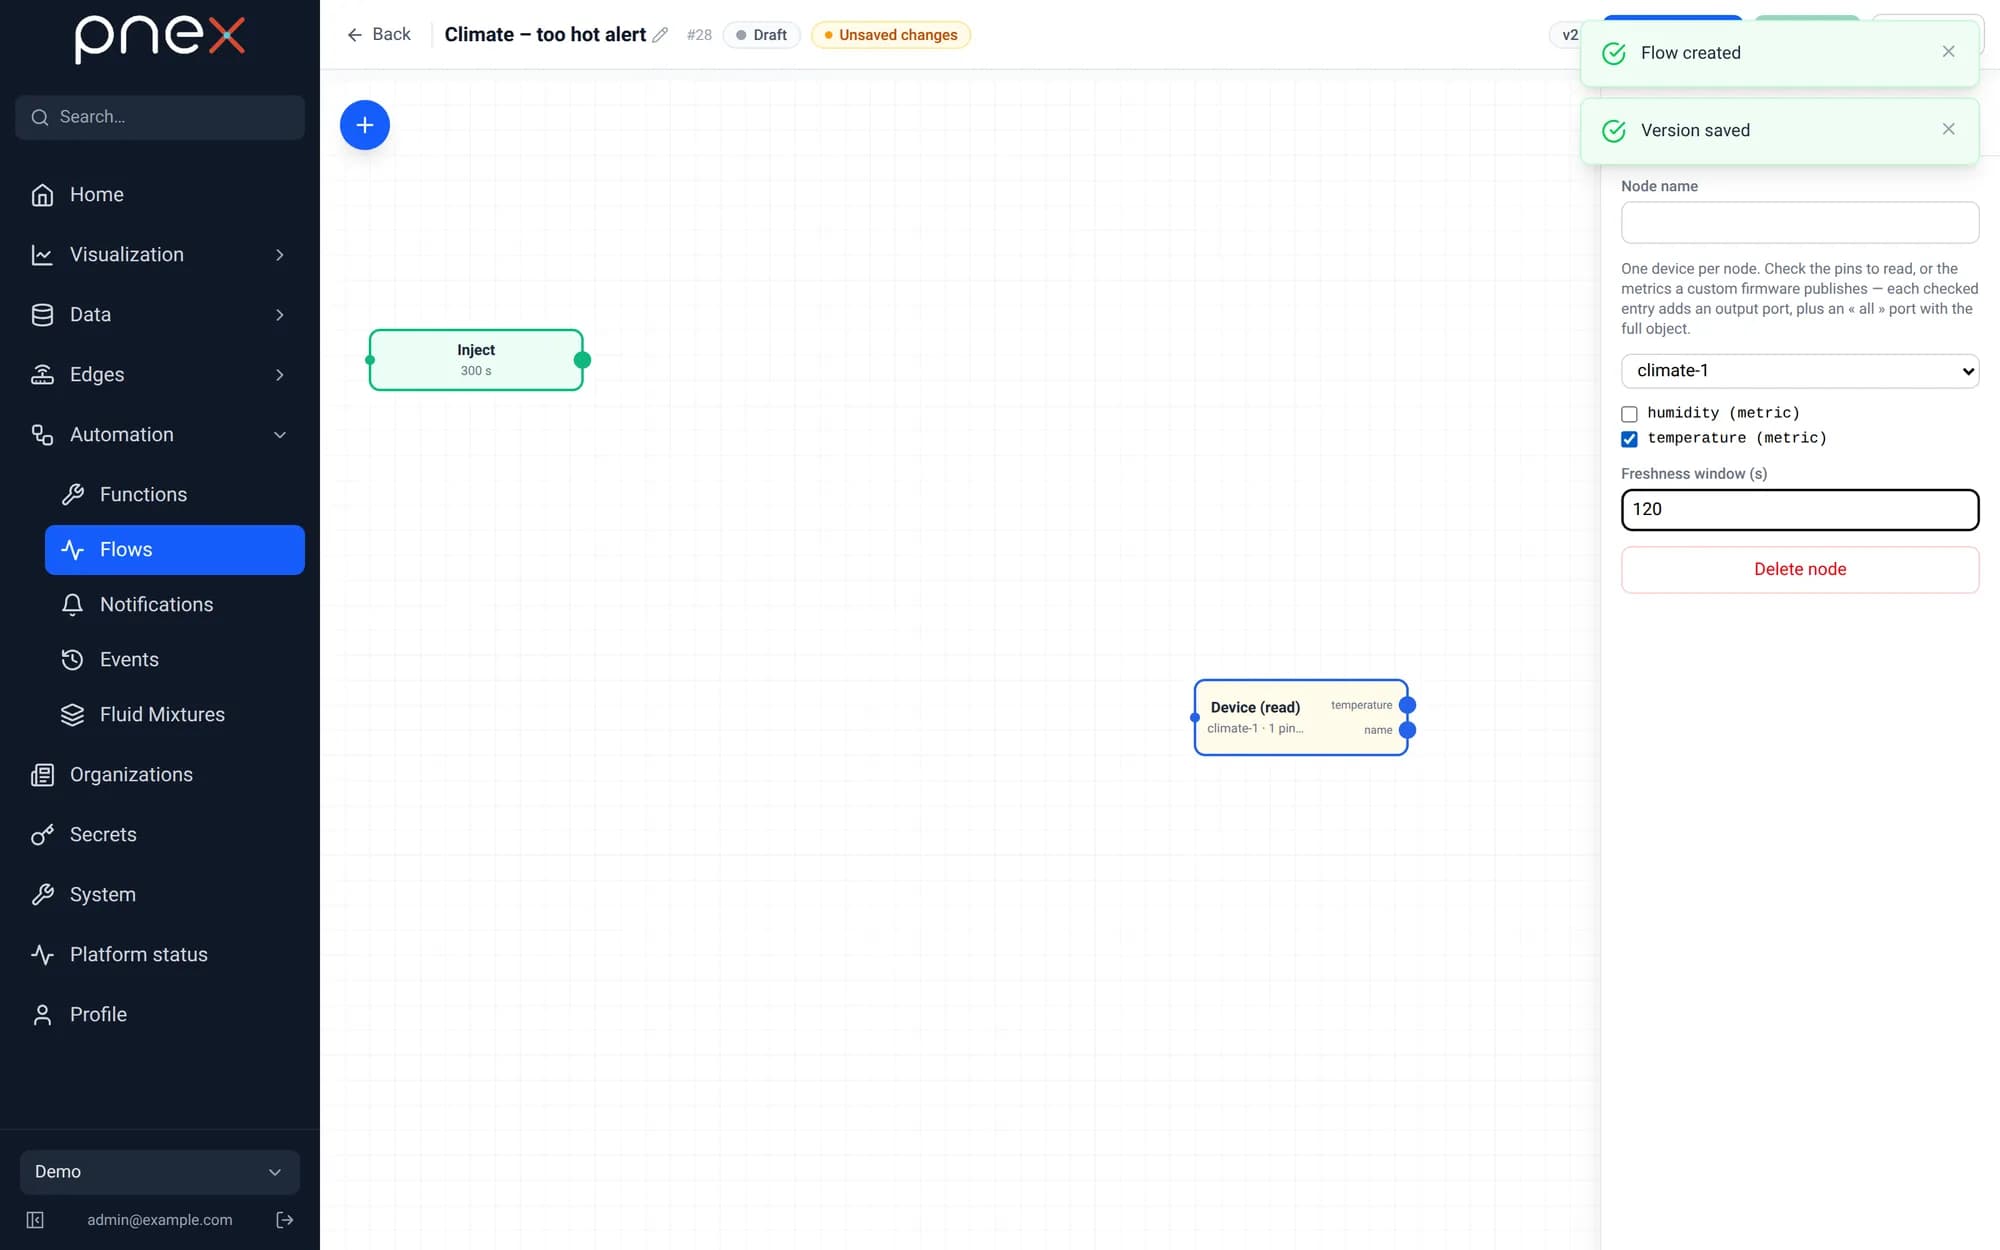
Open Automation → Flows → New flow and name it Climate – too hot alert.
- Select the Inject node already on the canvas and set its interval to
300seconds: the flow runs every 5 minutes. - Add a Device (read) node, pick
climate-1and check temperature (metric). Set the freshness window to120seconds, so an unplugged sensor never triggers an alert with an old value.
Add the function and the notification
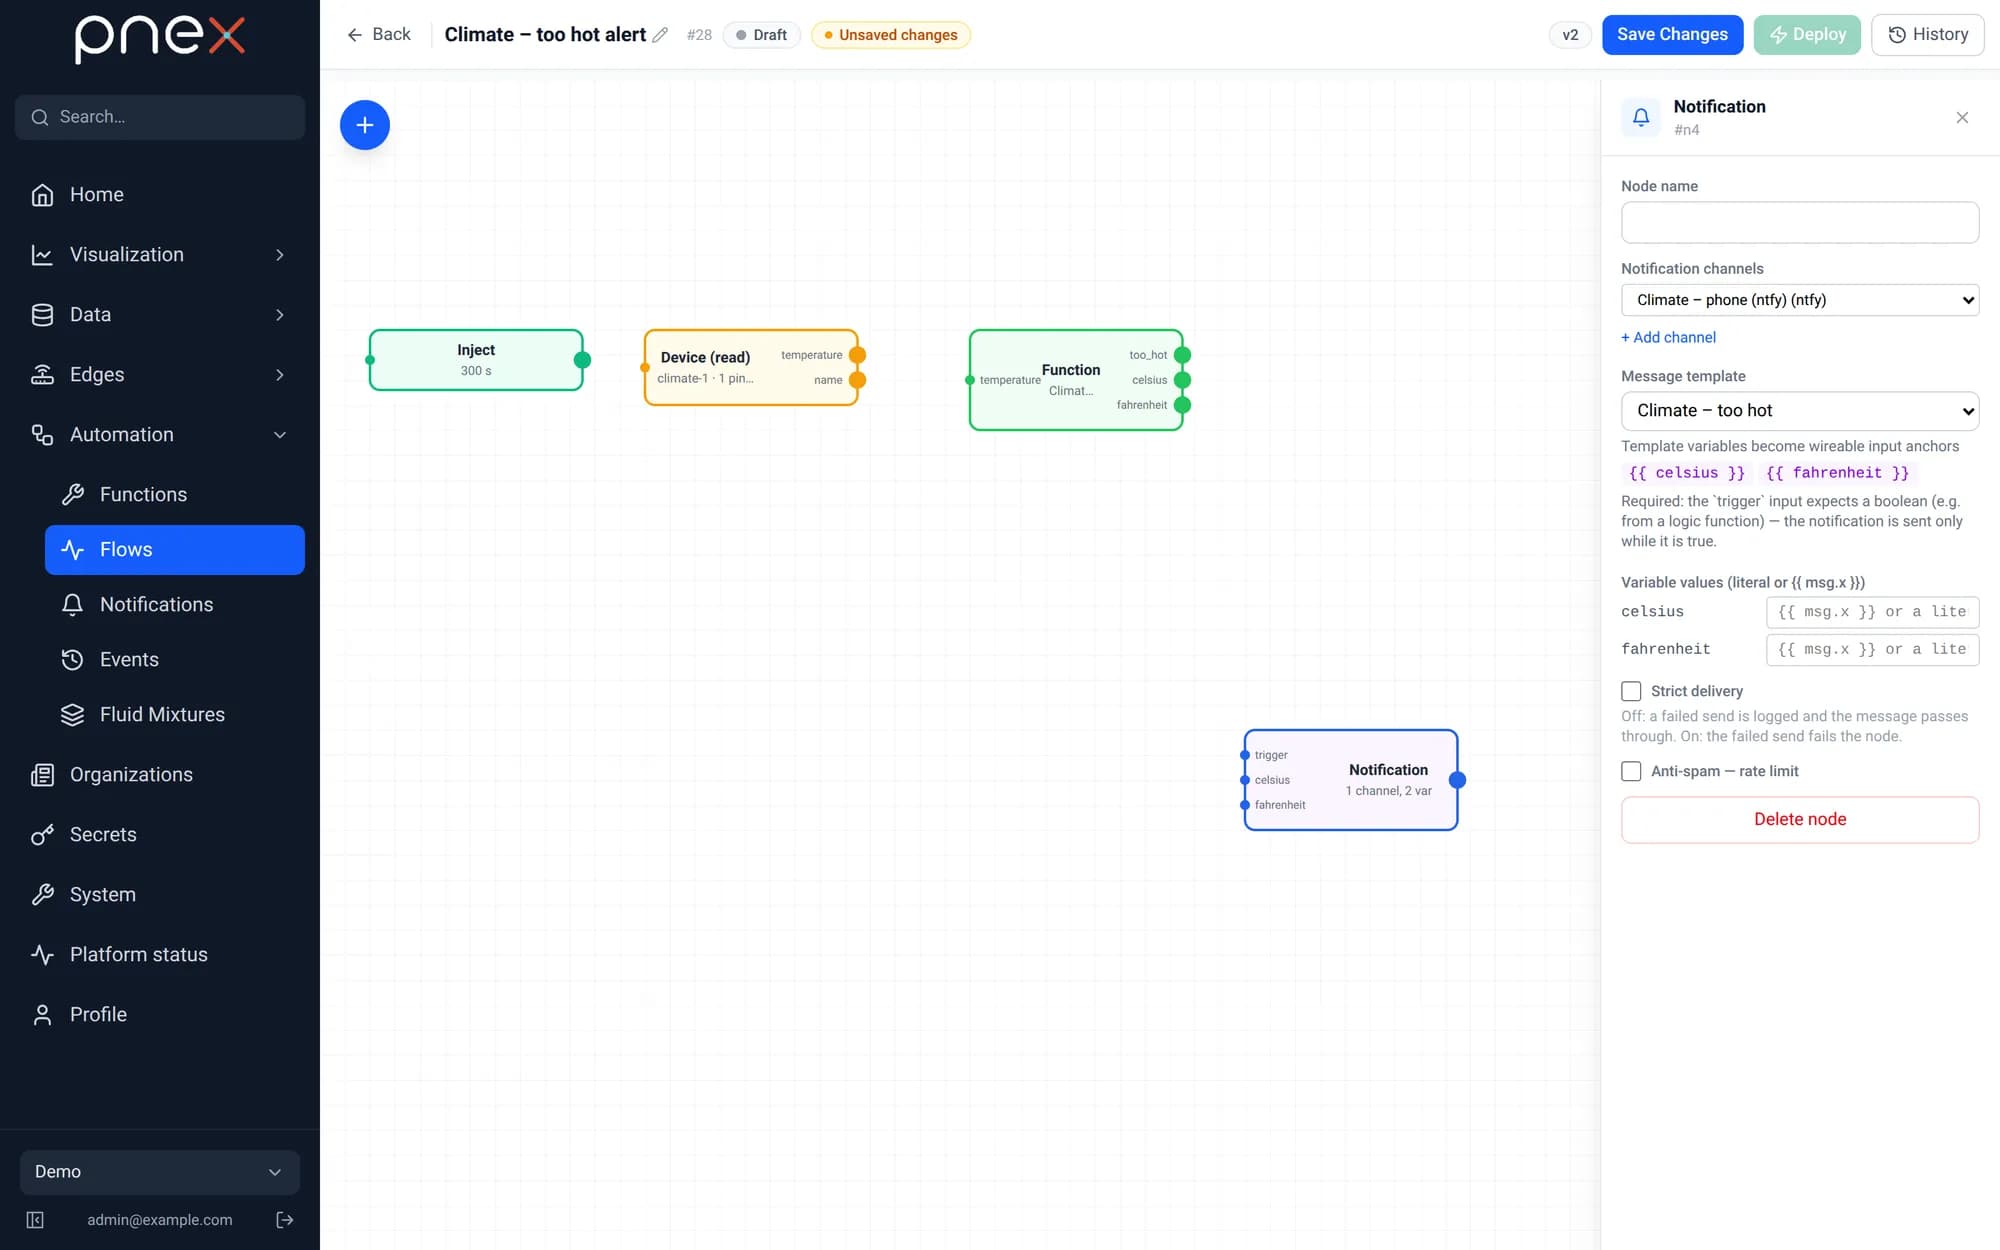
- Add a Function node and pick
Climate – comfort check. - Add a Notification node, add your ntfy channel (and in-app if you
like) and pick the template
Climate – too hot.
Wire it and deploy
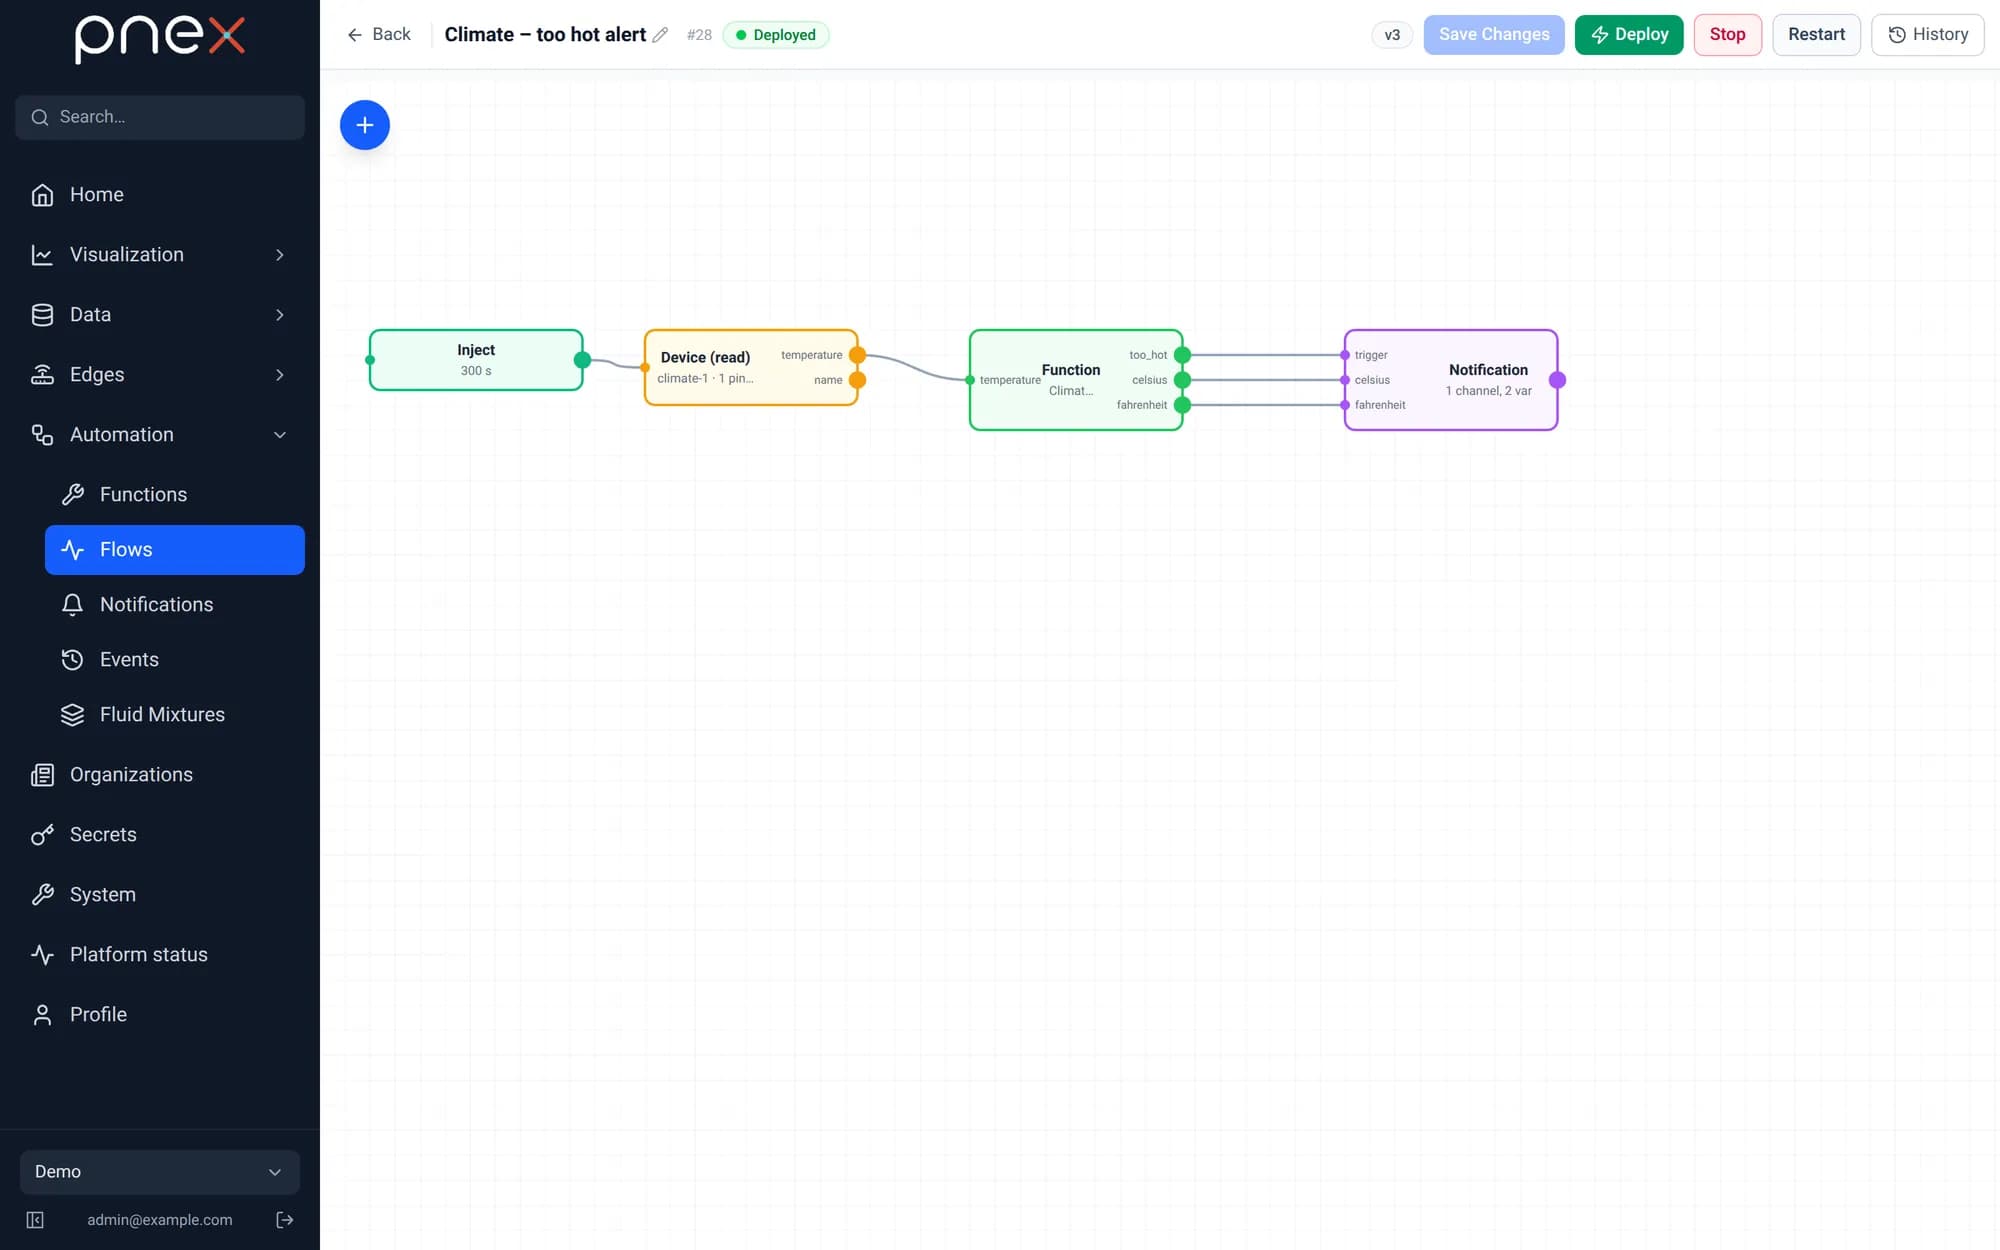
Drag the wires:
| From | To |
|---|---|
| Inject | Device (read) |
Device (read) · temperature | Function · temperature |
Function · too_hot | Notification · trigger |
Function · celsius | Notification · celsius |
Function · fahrenheit | Notification · fahrenheit |
The notification is sent only while trigger is true. Click Save changes, then
Deploy.
Test the alert
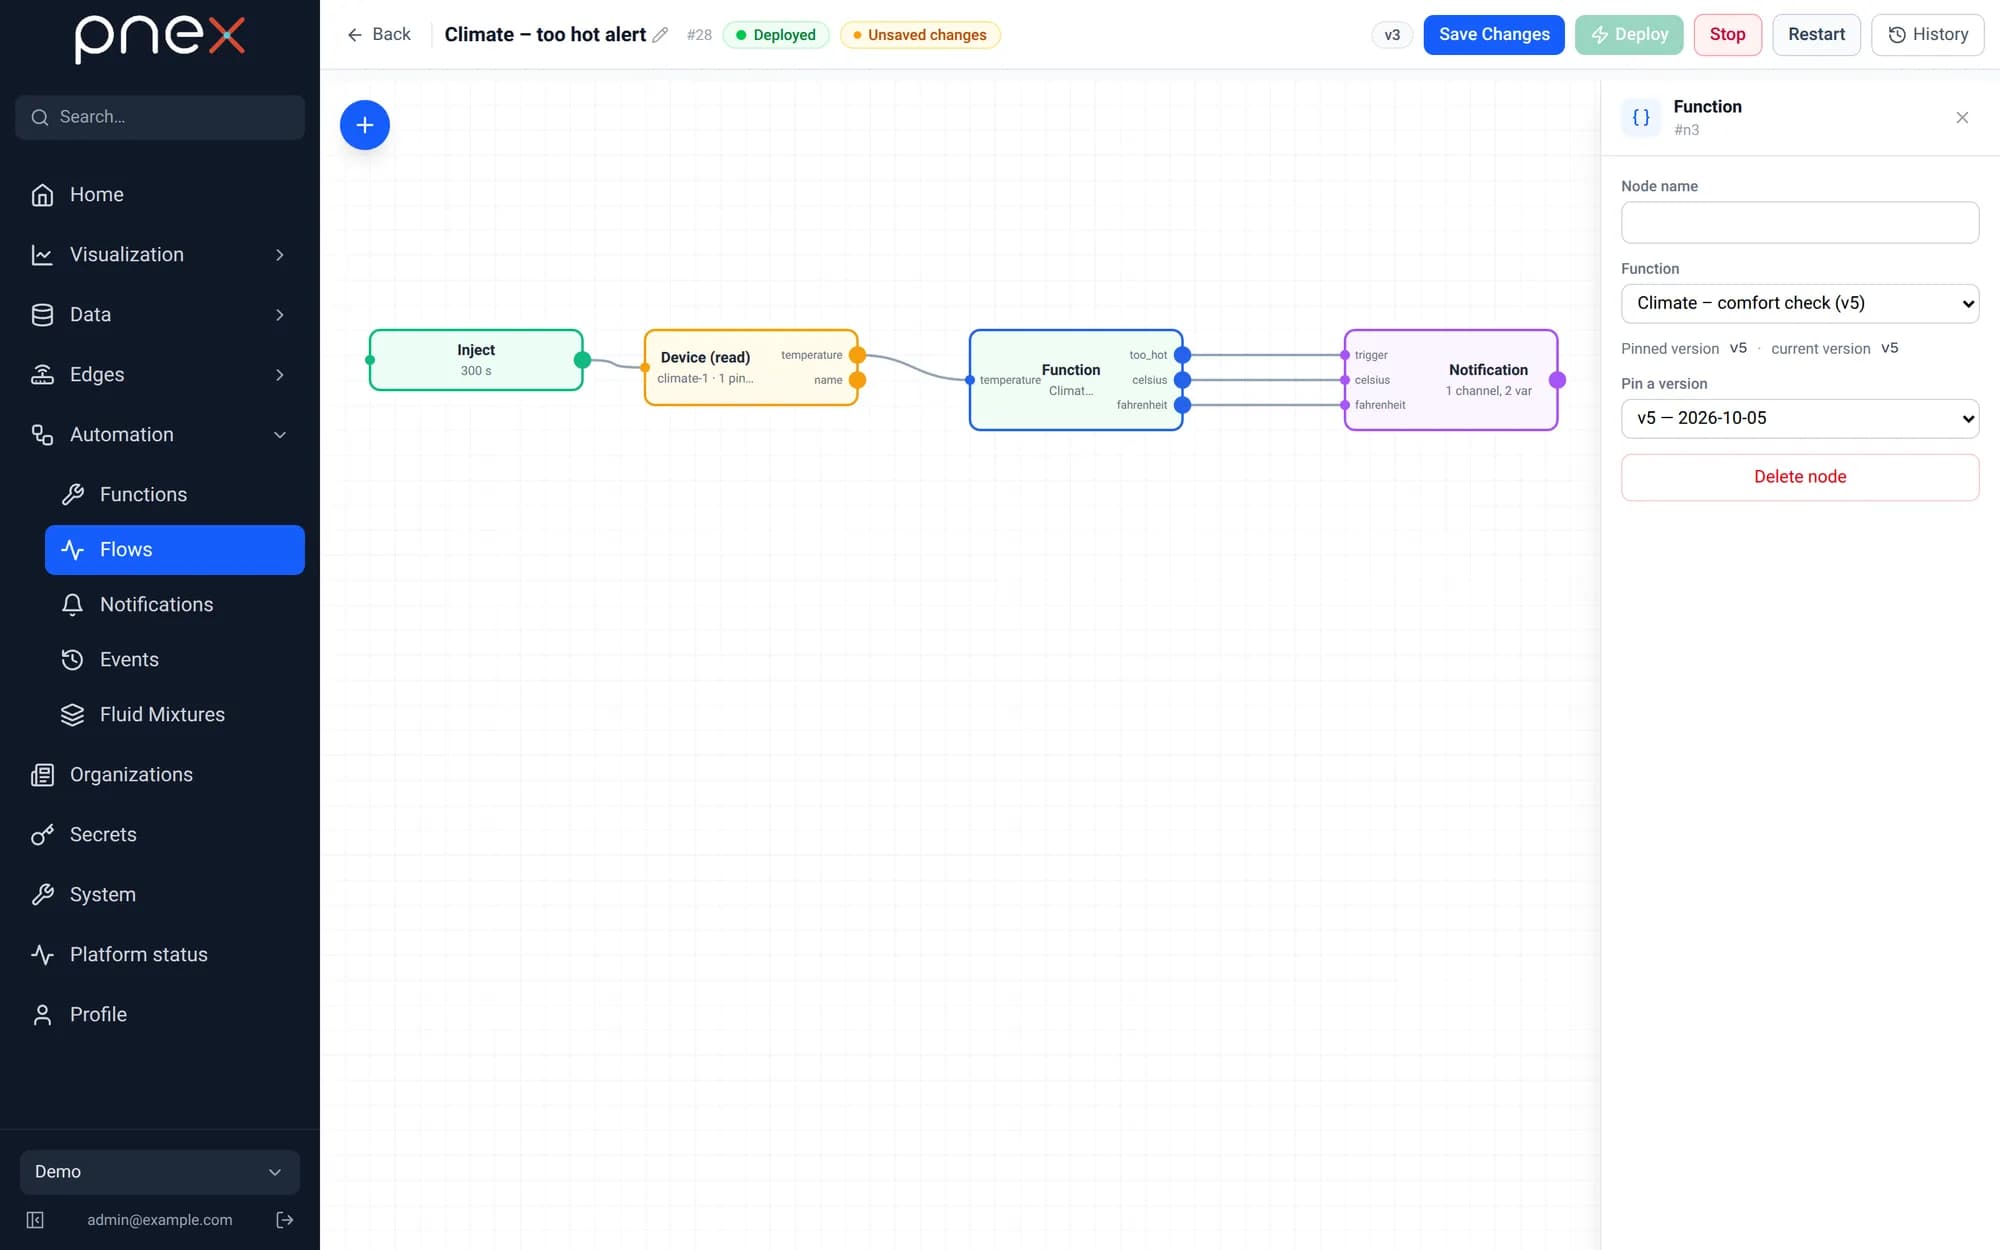
You don't have to wait for a heat wave:
- lower
THRESHOLD_Cbelow the current temperature in the function, save, select the new version in the flow's Function node and Deploy again; - or hold the sensor in your hand for a minute.
At the next run (at most 5 minutes) your phone buzzes.
Check the delivery journal
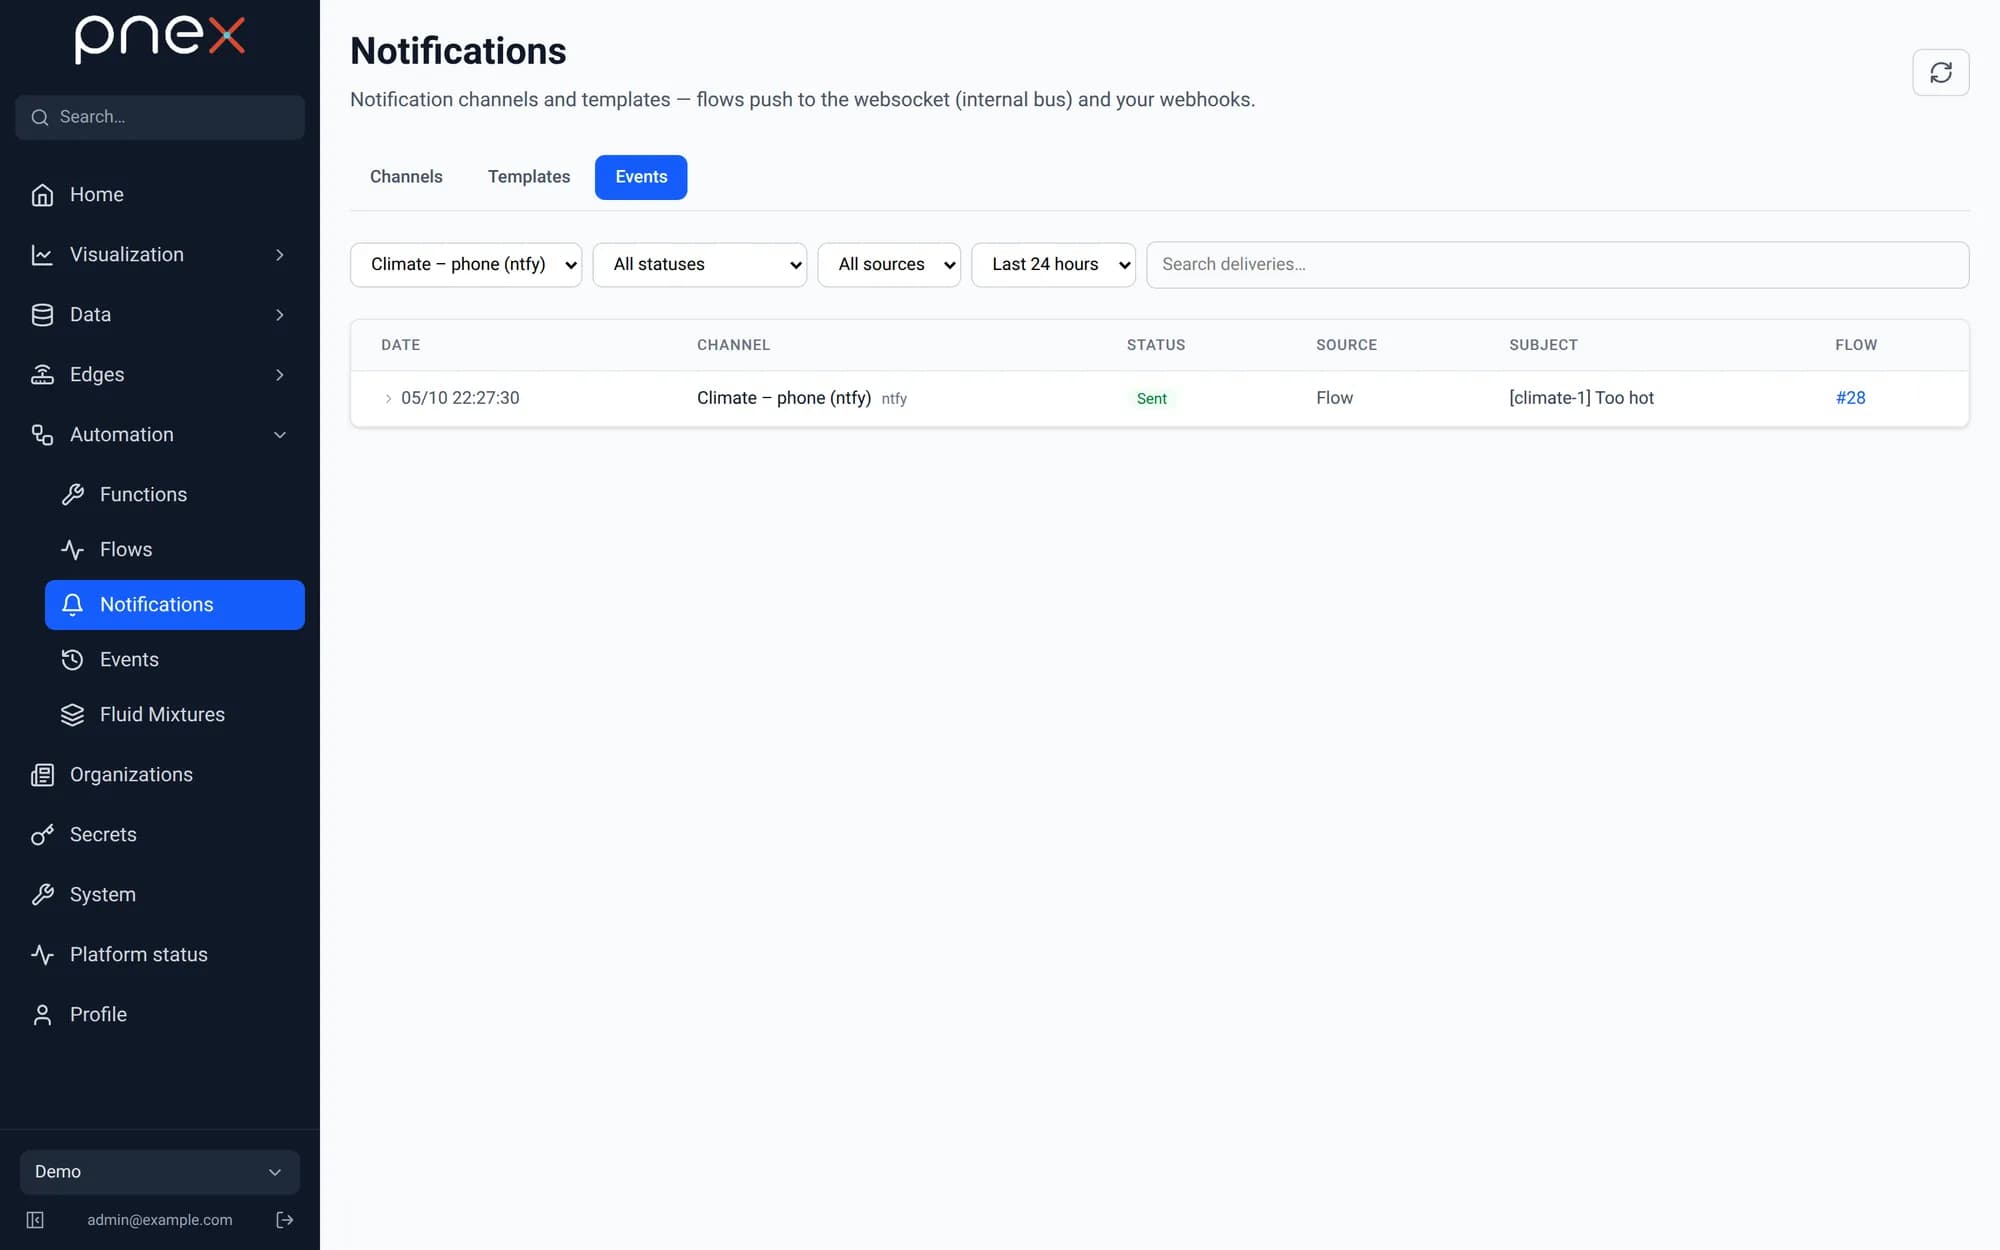
Every message is listed in Automation → Notifications → Events (or Journal on the channel row): date, channel, status (Sent, Failed, Blocked (anti-spam)) and the flow that sent it. Click a row to see the error detail of a failed send.
On your phone
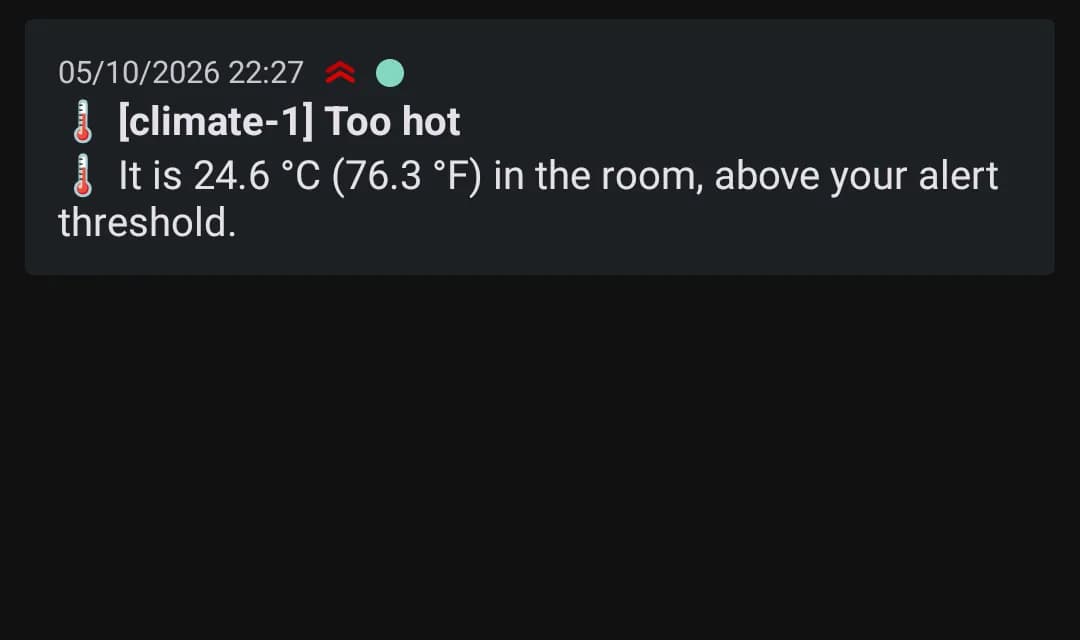
The ntfy app (or the ntfy web page of your topic) shows the alert with the values rendered by the template.
As long as it stays too hot, you get one message every 5 minutes. Change the Inject interval to get fewer.
Troubleshooting
| Symptom | Cause and fix |
|---|---|
Serial console prints AM2301 read failed | The yellow wire is not on GP0 (count again: 5V, GND, 3V3, GP0), the 10 kΩ resistor is missing, or the pin headers are not soldered. |
| Device stays "Inactive" after flashing | Wrong Wi-Fi password or a 5 GHz network. Check the Wi-Fi in Referentials, then Rebuild and flash again. |
| "Revision does not compile" | The error is shown under the editor, with its line number. A missing #include <DHT.h> means the library was not added (+ Lib). |
No temperature (metric) checkbox in Device (read) | The device has not published yet: check Quick charts first. |
| The flow is deployed but no message arrives | The temperature is below THRESHOLD_C, or the notification channel failed: see Automation → Events. |
Going further
- Add a humidity alert: a second input in the function and one more output.
- Put the curves on a dashboard for your phone.
- Change the code, Save, then Rebuild and Update over the air: no more USB cable.
Before you start
Prerequisites
No prerequisite: this is a starting point.
Parts & services
What this tutorial needs.
Server
Boards
Sensors
- 1×AM2301 (DHT21) temperature & humidity sensorWired housing, three wires: red, black, yellow
Wiring
- 1×10 kΩ resistorPull-up on the sensor data line
- 1×Breadboard
- 3×Dupont jumper wires (F-F, M-F)
- 1×USB data cable (not charge-only)
Services & accounts
- 1×2.4 GHz Wi-Fi networkESP boards do not see 5 GHz networks
Tools
- 1×Chrome or Edge (Web Serial)Flashing from the browser needs Web Serial
What next?
These tutorials build on this one.