

Register and flash your first board
An ESP board flashed from the browser, connected and reporting to PNeX
Easy 20 min
#deviceName the device
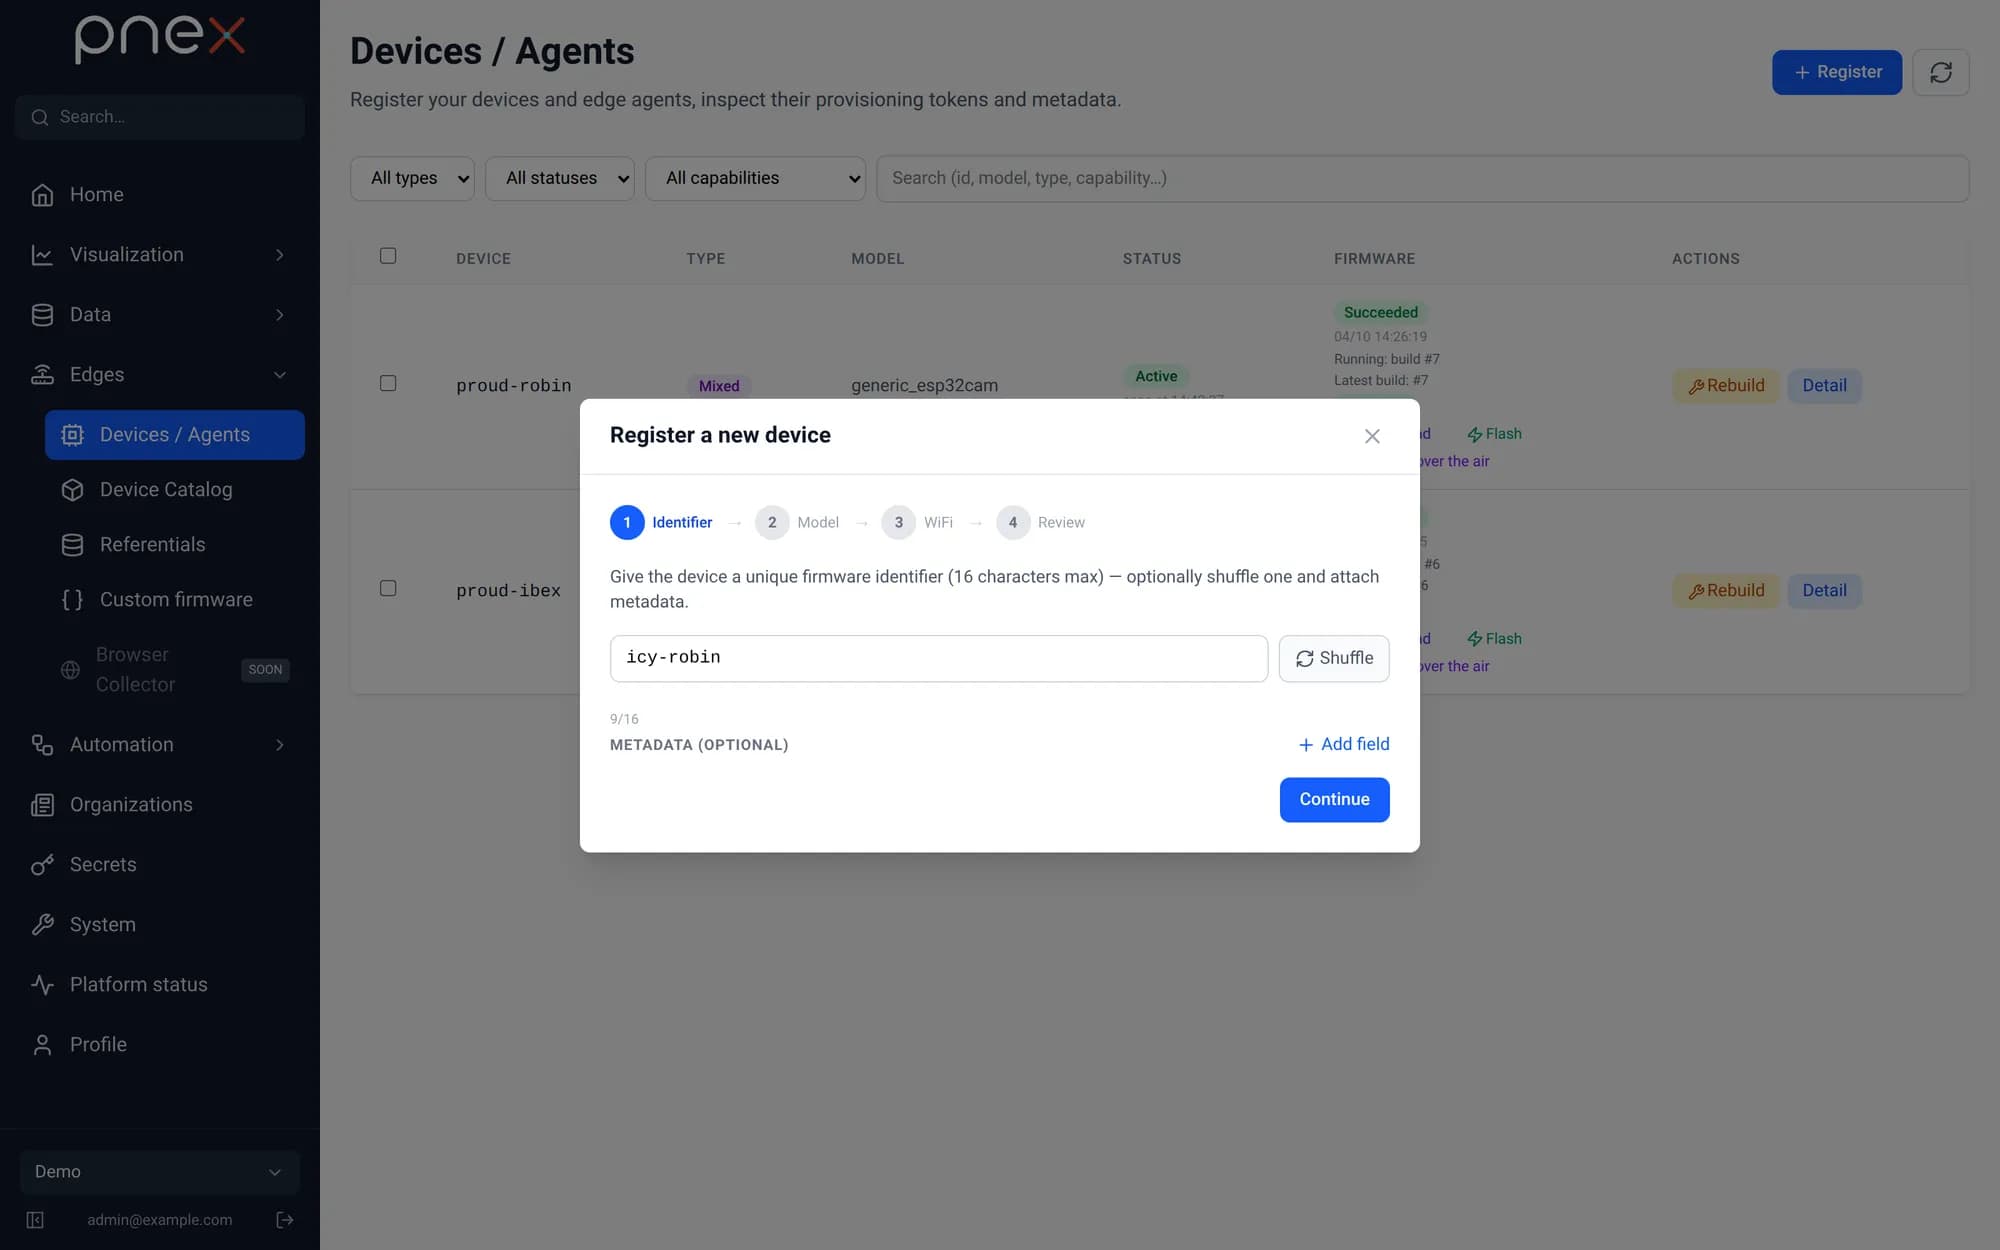
Open Devices / Agents → New device and give it a name you will recognise in
flows, e.g. plant-1.
Pick the board model
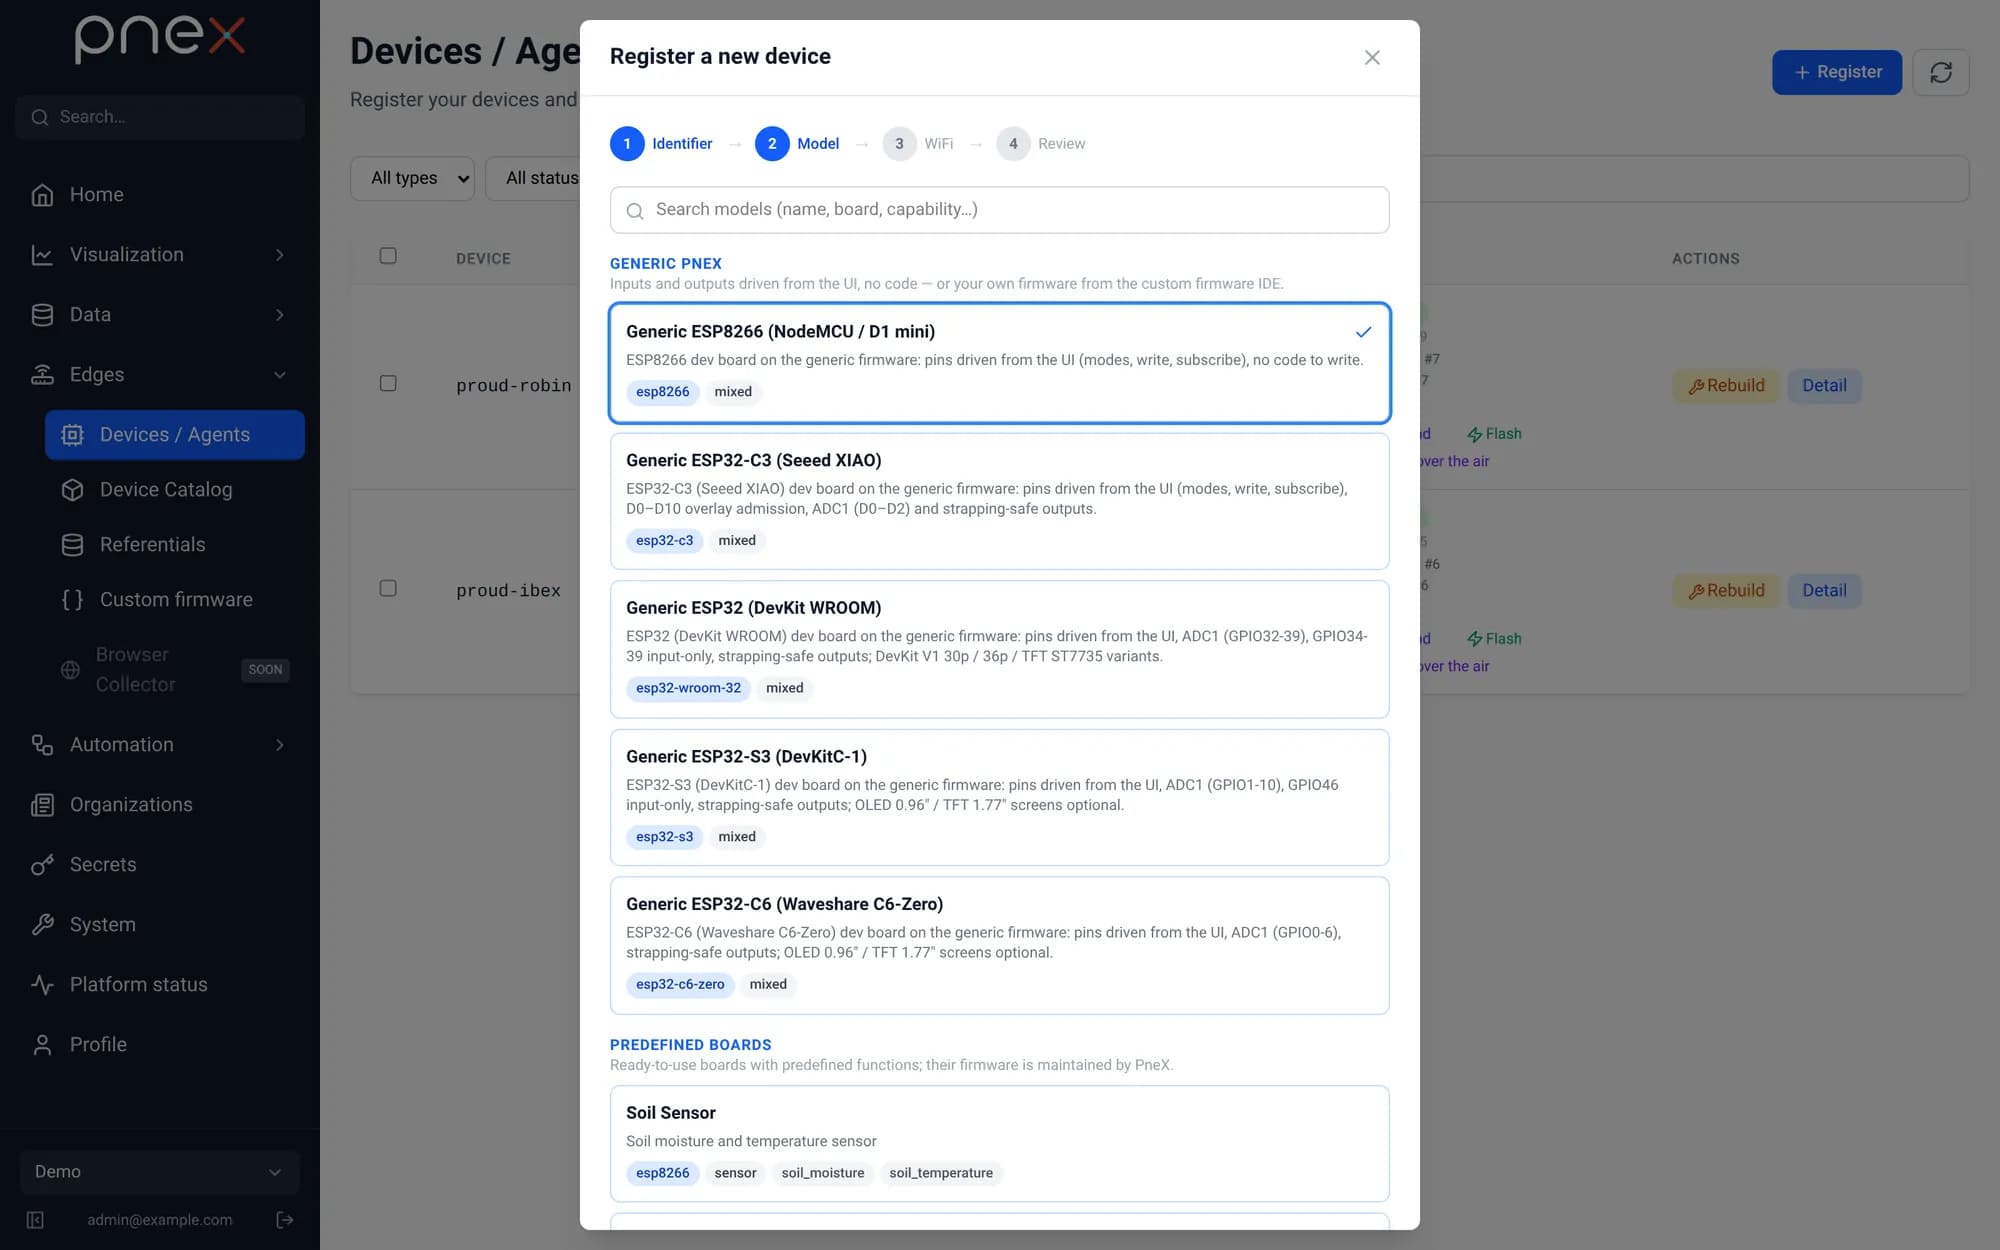
Choose the board you have. The pinout shown later comes from this choice.
Wi-Fi
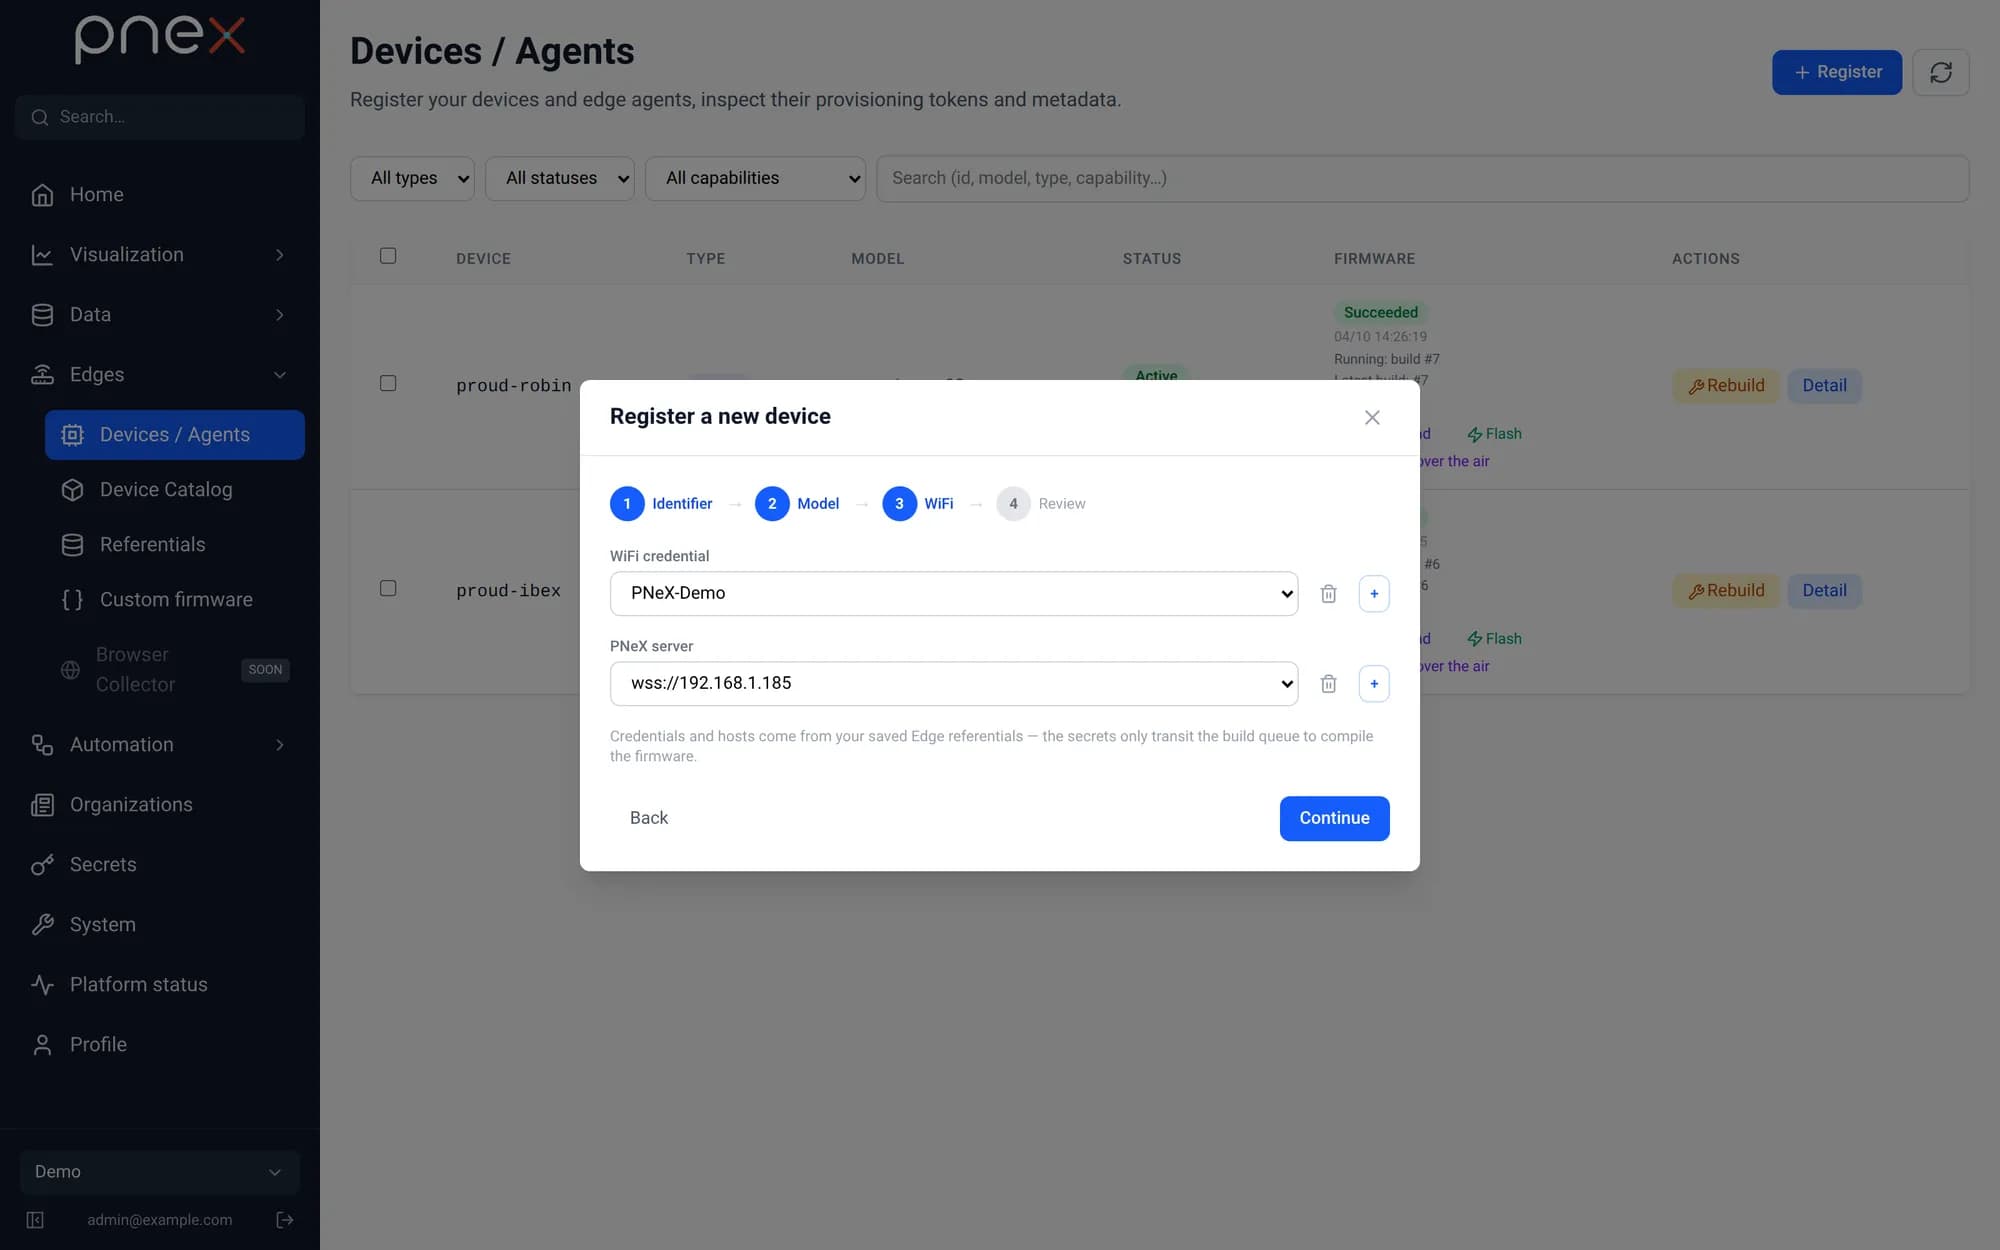
Enter a 2.4 GHz network: ESP boards do not see 5 GHz networks.
Flash from the browser
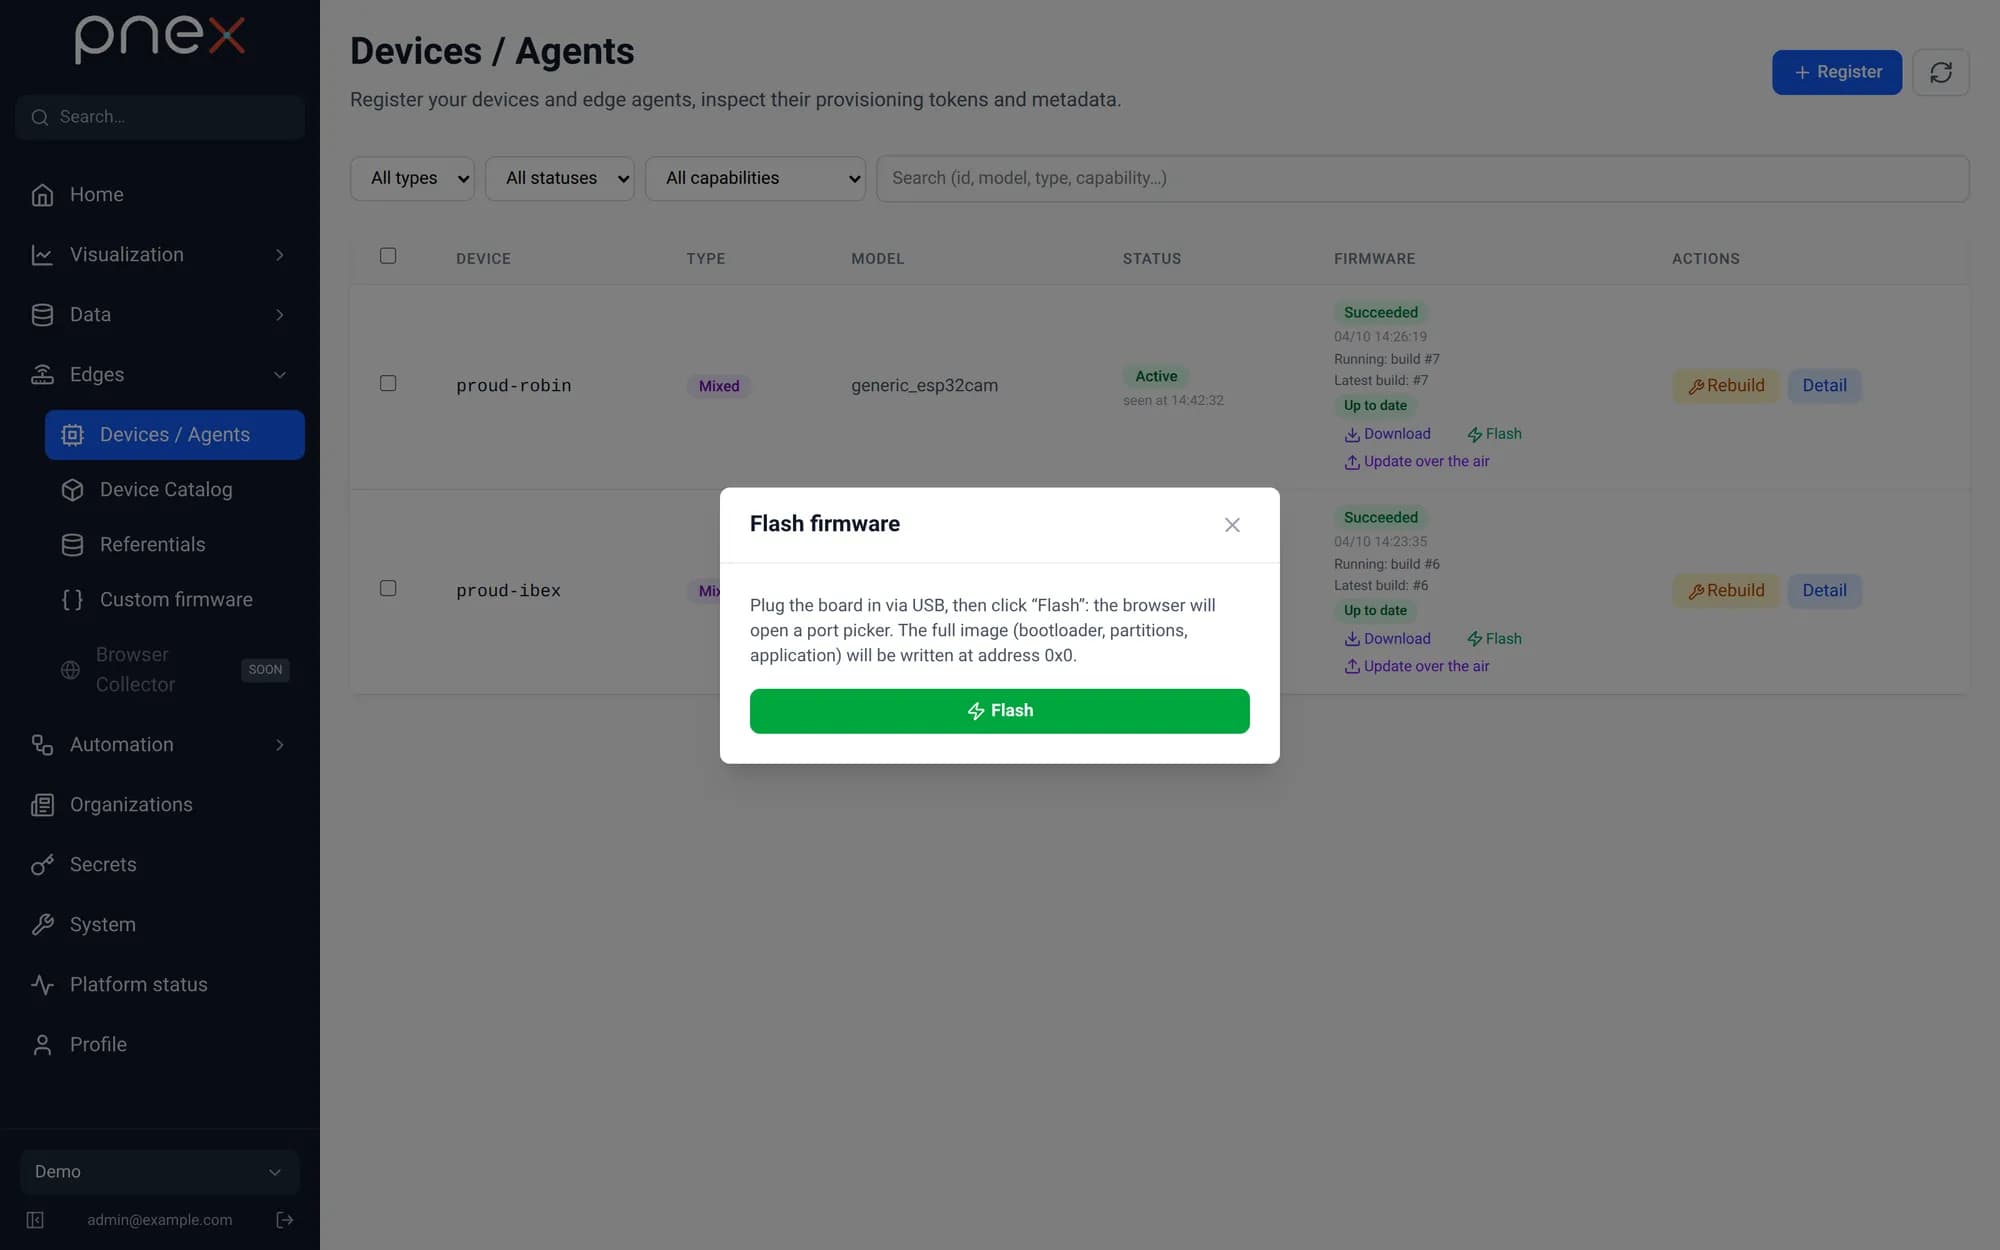
Plug the board with a data USB cable, click Flash and pick the serial port.
After the reboot, the device turns online in the device list.
Before you start
Prerequisites
Finish these tutorials first.
Parts & services
What this tutorial needs.
Boards
Wiring
- 1×USB data cable (not charge-only)
Services & accounts
- 1×2.4 GHz Wi-Fi networkESP boards do not see 5 GHz networks
Tools
- 1×Chrome or Edge (Web Serial)Flashing from the browser needs Web Serial
Already covered by the prerequisites
- Set up PNeX on a Raspberry Pi · depending on your choice
Raspberry Pi 5 (8 GB) / Raspberry Pi 4 (4 GB+) · Official Raspberry Pi USB-C power supply · microSD card, 32 GB, high endurance · USB 3 SSD · Raspberry Pi Imager
- Set up PNeX on a Linux VM · depending on your choice
Linux VM or server (Debian/Ubuntu)
What next?
These tutorials build on this one.